• Skip to primary navigation
  • Skip to main content
  • Skip to primary sidebar

Mind in the Butter

Food for taste, buds, and family

  • Recipes
    • Appetizers & Snacks
    • Breakfast
    • Desserts
    • Dinner
    • Drinks & Cocktails
    • Instant Pot
    • Pasta & Grains
    • Salads & Vegetables
    • Seafood
    • Sides
    • Soups & Stews
  • Entertaining
    • Holidays
  • Life & Travel
  • Food & Sustainability

Dinner

Shulamit’s Unreal Lasagna with Ground Beef and Spinach

November 4, 2018 by Eva Louise 3 Comments

One of the many perks of having a new baby is people come to your home to shower you with love, gifts, and delicious food. Needless to say, I was beyond thrilled when my childhood babysitter Shulamit came over toting a huge pan of lasagna. After a lovely afternoon catching up, she wasn’t barely back to Jersey before I snarled down half the pan. I had to go sit in the living room with my hands under my butt to keep from eating the whole damn thing before Ray got home. Every day after that, I woke up each morning thinking about her lasagna so I knew I needed her recipe so I could move on with my life.

The lasagna recipe is extremely important but we need to talk about Shulamit. She’s this tall, gorgeous, Jewish amazon with dark hair and sparkling eyes (not relevant but still feels important to highlight). 

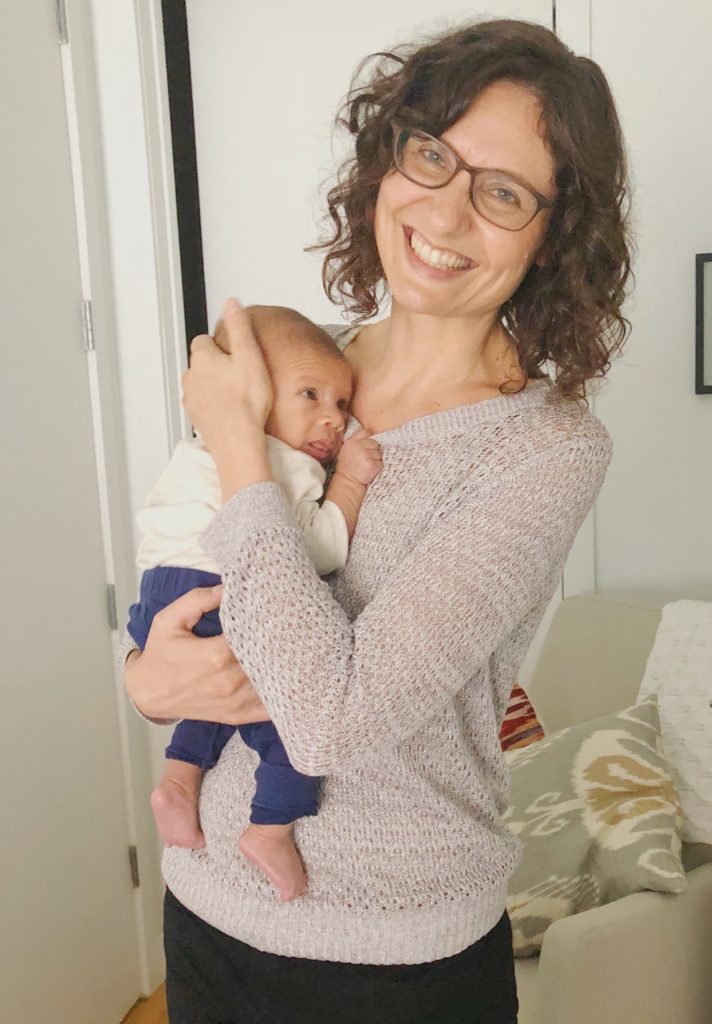
Best babysitter everrrrr + my little squid

Ok, actually wait…if you’re just hankering for the recipe just scroll straight to it. 

Now that those lasagna addicts have cleared out, she was THE BEST babysitter. The kind that would bring a bag of fun activities and crafts to our house each visit, the kind that was stern but fair, the kind you didn’t want to disappoint no matter how hard you reeeaalllyy wanted bend all your baby brother’s fingers back and put your thumbs in his eyeballs.

She taught us practical things like how to clean our room when it was paralyzingly messy (start from a corner and fan out), that a cup of Lipton tea should be 1 part tea, 1 part milk, and 1 part sugar (yummmm) and most importantly, she was one of the first people to expose me to food writing.

Ok, it was really rudimentary and my claim is a total stretch but, one of her babysitter bag activities was writing a “cookbook.” She had us staple pieces of paper together and decorate the cover.  I got as far as scribbling “Monkey balls” on the first page with no meaningful list of ingredients or thoughtful instruction, but I’ll give her credit for sparking my initial interest in food. Funnily enough, her mother is a phenomenal chef and her sister is an extremely successful food writer. 

So whether you’re a babysitter, an aunt, or a friend you never know the lasting impact you may have on a child. Such a beautiful thing!

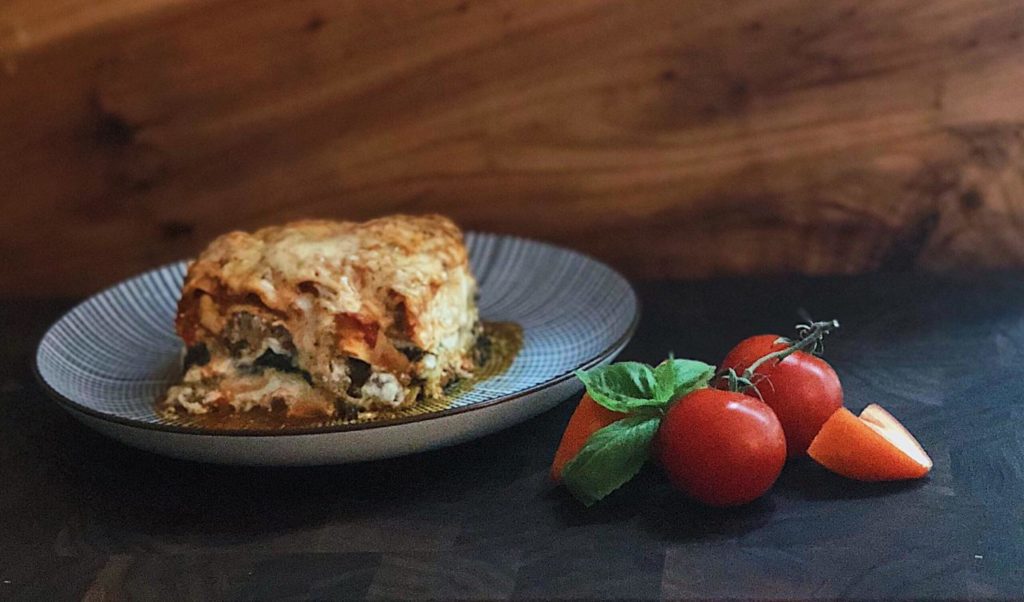
Ok, at last, my take on Shulamit’s unreal lasagna.  It turns out she did a riff on this recipe here but kept it vegetarian, added a whack ton of scallions, and did a mix of Rao’s marinara and Pomi pureed tomatoes. So, since I can’t follow a recipe for my life I did a riff on her riff (so meta). I added the ground beef back in from the original (it’s honestly delicious without it but Ray is a carnivore), hit it with  some fresh spinach for some greenery, and a filthy amount of garlic (I got one of those huge bags of peeled garlic from Costco so you KNOW I went wild). But the real hero here is the no boil Barilla lasagna sheets. Man those things a game-changer. Make this tonight. Extra points if you make this for someone who just had a baby!


1 vote

Print

Shulamit's Lasagna

Prep 40 mins

Cook 1 hour, 5 mins

Total 1 hour, 45 mins

Yield 8-9 servings

adapted from this Genius recipe: Barilla No Boil Lasagna

Ingredients

  • 1 (9 ounce) Box barilla no-boil lasagna noodles
  • 2 Eggs
  • 1 (15 ounce) Container ricotta. I suggest a high quality whole milk one
  • 5 Cups shredded mozzarella cheese
  • 1⁄2 Cup parmesan cheese (optional but why wouldn't you add more cheese?)
  • 1 lb Ground beef or 1 lb sausage
  • 2 (24 ounce) Jars Rao's marinara OR 1 jar Rao's, 1 jar Pomi pureed tomatoes 
  • 6 Cups fresh spinach
  • 6-8 Cloves crushed garlic (don't judge me)
  • 3 T Italian seasoning
  • Bunch of scallions (about 6), thinly sliced

Instructions

  1. Preheat oven to 375.
  2. In bowl, combine beaten eggs, ricotta cheese, 3 cups of the mozzarella cheese, parmesan, scallions, salt and pepper.
  3. Set aside.
  4. Brown the ground beef, add italian seasoning, crushed garlic, salt and pepper.
  5. Once browned add fresh spinach and wilt, cooking off any excess water.
  6. In a 13X9X3 pan, spread enough sauce to thinly cover bottom of pan.
  7. Layer in the order, 4 uncooked lasagna noodles (they will overlap), then 1/3 part of the ricotta cheese mixture, half the browned meat and 1 cup of marinara sauce.
  8. Next layer, 4 uncooked lasagna noodles, 1/3 part of the ricotta cheese mixture, and 1 1/2 Cups sauce.
  9. Next layer, 4 uncooked lasagna noodles, remaining ricotta mixture and remained meat, 1 cup of sauce.
  10. For top layer, 4 uncooked lasagna noodles, remaining sauce, and remaining mozzarella.
  11. Bake covered with foil for 50-60 minutes.
  12. Uncover and continue cooking until all the cheese is melted on the top (about 5 minutes).
  13. Let stand 15 minutes before serving.

Courses Dinner

Cuisine Italian


Filed Under: Dinner, Pasta & Grains, Recipes

Seared Scallops and Fennel Risotto

October 16, 2018 by Eva Louise 1 Comment

Nothing feels more triumphant than expertly mastering a difficult dish. For me, it’s my seared scallops and fennel risotto. And I know I’m awesome at it because it’s hands down the most requested dish I make for special occasions. I’ve been making (and perfecting) it for almost ten years and I think I’ve finally got it down. As for the risotto, this one features fennel but you could easily do a butternut squash and sage one, a beet root one, a pesto one…the list goes on.

A note on the scallops, since you know, I’m like, THE expert. Searing scallops is not easy, it takes patience and a hot-ass pan. The trick is to not be afraid of the heat and to not be tempted to shake the pan or peek under the scallops before they are actually ready. The reward is crispy and tender scallops and a buttery, fragrant risotto. An important thing worth emphasizing: be sure to get “dry” or “diver” day boat scallops. Fishmongers often store scallops (and most seafood) in a salt solution to maintain freshness and make the appearance of the seafood more plump. Avoid this at all cost- and yes, day boat scallops are more expensive. If you don’t, that’s a one-way ticket to squishy, squeaky, wet scallops and you’ll get annoyed and curse me and never attempt these again.

Keep practicing with this one!

1 vote

Print

Seared Scallops and Fennel Risotto

Prep 45 mins

Cook 1 hour

Total 1 hour, 45 mins

Yield 2-4 servings

Ingredients

For the scallops

  • 1 pound (about 12- 15) dry day boat scallops
  • olive oil
  • salt and pepper to taste

For the risotto

  • 1 cup arborio (risotto) rice
  • 1 medium fennel bulb, cut into 1/2 inch cubes
  • 3-6 garlic gloves (per your preference)
  • 1 onion, cut into 1/2 inch cubes
  • 1 cup cheese from a block of good salty parmesan or pecorino
  • 1/2 cup good dry white wine
  • 6-8 cups chicken or vegetable stock
  • 3T ish olive oil
  • salt and pepper

Instructions

  1.  Line a cookie sheet or large platter with 2 layers of paper towel.
  2. Prepare the scallops by rinsing them thoroughly to remove sand and the muscle on the side of each scallop. This is a tough, fibrous piece that looks kind of like the tab on a soda can. Feed it to your cats or dog and make them happy.
  3. Place clean scallops on the paper towel-lined cookie sheet and dry as thoroughly as possible. They should be almost sticky they are so dry. Keep them on the paper towel and place in fridge.
  4. De-core and chop fennel into small 1/2 inch cubes. Fennel doesn't breakdown as much as an onion does when cooked so whatever size you chop it to, assume it will stay that size. Keep a few fronds for garnish at the end if you're feeling fancy.
  5. Chop onions; peel and slice or crush the garlic.
  6. In a dutch oven or large pot, heat a few tablespoons of olive oil. Once glistening, add the risotto rice and toast for about 3 minutes then add fennel, onion, salt, pepper and half your portion of garlic and sauté until onion and fennel are soft.
  7. In a separate saucepan, heat stock or broth and keep on low to simmer. More on this below.
  8. Take swig of wine, then deglaze pan with a good glug or 1/2 ish cup of it. Once wine has evaporated, ladle in one cup of warm broth into the risotto and continue to add a ladle at a time until each cup is absorbed by the rice.  Be patient with this step. It's kind of annoying but makes the risotto really creamy and tender without the cream! The risotto will tell you ultimately how many cups it needs so don't worry if you have a little broth left over in the small pot.
  9. Once risotto starts to soften (about 20 mins), add remaining garlic, a huge whack of good salty cheese, about 1/2 cup and check in on your salt and pepper levels.
  10. Start heating a large skillet (NOT a non stick one) for your scallops on high. Coat with 2 ish tablespoons of olive oil, depending on your skillet size. Pull scallops out of fridge and sprinkle one side with salt and pepper. Note: we waited to salt the scallops until the last second to avoid drawing water out of them. Goal is to keep them as dry as possible to get the best sear.
  11. Wet your finger under the faucet and flick water off your finger into the oil in the skillet. It should hiss, spit and pop when you do this. If it doesn't, wait and try again once pan is hotter.  Only when the skillet passes the water test, carefully place scallops seasoned side down into the pan.  Let sear for about 3-4 minutes and then flip. If the scallop is properly seared, it shouldn't stick to the pan and you should see the brown carmelization creeping up the side of the scallop. This takes practice. Finish second side for 2 mins and transfer scallops to a platter or just turn off the burner.
  12. Check on your risotto, adding any remaining stock to finish cooking the rice. If needed, add fresh crushed garlic, salt, pepper depending on what you think it needs. Garnish with some more cheese and the reserved fennel fronds.
  13. Spoon some creamy risotto onto a pretty plate with 4-6 scallops nestled on top and be sure to drizzle any scallop juice from the pan or plate onto the dish before serving.

Filed Under: Dinner, Pasta & Grains, Recipes, Seafood Tagged With: recipe, seafood

Season (In)appropriate: Slow Cooker Turkey Chili

June 13, 2014 by Eva Louise 2 Comments

In a sea of summer soups like gazpachos and celery veloutés, turkey chili doesn’t exactly have an obvious place in the summer repertoire, but I like turkey chili and I like my slow cooker so who’s to say I can’t make a classic winter dish in summer?  I’m not entirely sure if my turkey chili is healthy, but I use ground turkey instead of beef and add tons of beans and peppers which are good for you so…let’s say it’s healthy.  There’s a lot of great slow cooker turkey chili recipes out there which are helpful reference, but I mostly wing it and adjust flavors every few hours. That being said, check out my basic recipe below in case you too want to add some extra heat to your summer in the form of turkey chili!

turkey-chili

Slow Cooker Turkey Chili

  •  1lb ground turkey
  • 2 small onions, chopped
  • 3 garlic cloves, crushed
  • 2 cans crushed tomatoes
  • 1 can kidney beans, drained
  • 1 red pepper, chopped
  • 1 green pepper, chopped
  • 1 tsp cumin
  • 1 tsp garlic powder
  • 1.5 T chili powder
  • 1 T smoked paprika
  • Salt and pepper to taste
  • hot sauce (my recipe here)

Heat skillet to medium-high heat and brown ground turkey. Drain and add a drizzle of olive oil and mix in 1 of the chopped onions to the turkey. Cook until softened. Transfer the onion and turkey to the crock pot and add the peppers, crushed tomatoes, crushed garlic, chopped onion and seasonings.  Mix well. Cook in crock pot for 8 hours on low or 4 hours on high.  In the last hour, add drained and rinsed can of beans. Fold in a few shakes of hot sauce before serving for some extra heat.

Serve with a dollop of low-fat sour cream or Greek yogurt and a few cubes of avocado (if you have one miraculously handy).

Filed Under: Dinner, Soups & Stews Tagged With: chili, crockpot, slow cooker, soup

A Grill’s Best Friend: The Cedar Plank

May 19, 2014 by Eva Louise Leave a Comment


Cedar Plank Salmon

My cedar plank salmon with fresh herbs

Oh jeez, oh jeez! Summer is just around the corner and I’m already smackin’ my lips thinking about all the delicious things I want to throw on the BBQ. Fancy grilling tools like spatulas in the shape of American flags, pig-shaped BBQs, or inappropriate aprons like the ones with naked man or human-sized turkey print (my preferred choices) are obviously important, but all my votes go to the cedar grilling plank as the most essential BBQ accessory.

I soak the cedar planks in water for 4 hours (to keep them from burning), then place a simply-seasoned salmon filet on top before placing on the grill. The woody aromas completely penetrate the salmon; the tree sap caramelizes around the filet and it’s just **sigh**… yea…wow. Amazing. You must try it.

Food52’s ears must be burning because they are  featuring a 4-pack of grilling planks on their Provisions website right now and One King’s Lane is featuring a Plank Grilling Cookbook. Get ’em while they’re hot!

Cedar Plank 4-pack

Food52’s Grilling 4-pack. Photo by James Ransom


ZCedar Plank Grilling

One King’s Lane is selling Plank Grilling by Dina Guillen

Filed Under: Dinner Tagged With: bbq, grilling, salmon, seafood, summer

So…this happened: Epic Crab Pasta with Vodka Sauce and Garlic Breadcrumbs

February 24, 2014 by Eva Louise Leave a Comment

 DSC_0644DSC_0647

Stingray is coming home from Ethiopia soon and I can tell he’s seriously hankering for some of my homemade cooking.  I thought it would be fun to drive his belly bonkers by posting this epic crab pasta with vodka sauce that I made for the family a while back. It’s a Serious Eats’ recipe for Pasta with Crab, Tomato, and Chilies and it’s a knockout. It’s a simple set of ingredients with a medium level of difficulty (you need to blend the hot tomato sauce which I find to be challenging to do without incident), and one of the few recipes I actually followed entirely. The recipe is made extra delicious with the addition of homemade garlic breadcrumbs; with these I can assure you, there will be no leftovers. I’m sorry to report (not!) that my version was made with fresh dungeness crab that Dad caught earlier in the day. Brings tears to my eyes just thinking about it. Enjoy this beauty.

Pasta with Crab, Tomato, and Chilies

DSC_0646

 Ingredients

  • 2 tablespoons  butter
  • 3 tablespoons extra-virgin olive oil, divided
  • 3 medium cloves garlic, minced (about 1 tablespoon)
  • 1/2 teaspoon red pepper flakes
  • 1 (28-ounce) can whole peeled tomatoes, drained and roughly broken up by hand
  • 1/3 cup heavy cream
  • 1/4 cup vodka
  • Salt and freshly ground black pepper
  • 1 small red hot chili, finely sliced (optional)
  • 2 slices rustic bread, roughly torn
  • 2 tablespoons minced fresh chives
  • 2 tablespoons minced fresh parsley leaves
  • 1 pound fresh spaghetti, fettucini, or tagliatelle (dry pasta can also be used)
  • 1 pound lump or jumbo lump fresh crab meat (get the good stuff)

Instructions

  1. Heat butter and 2 tablespoons olive oil in a medium saucepan over medium heat until melted and foaming subsides. Add garlic and red pepper flakes and cook, stirring constantly, until fragrant but not browned, about 1 minute. Add tomatoes and heavy cream. Bring to a boil, reduce to a simmer, and cook, stirring occasionally, until lightly reduced, about 10 minutes. Add vodka and simmer for 4 minutes longer. Don’t blow up the kitchen!
  2.  Transfer mixture to a blender and blend on high speed until completely smooth. Season to taste with salt and pepper and transfer 2 cups to a large saucepan. Reserve remaining sauce for another use. Don’t burn yourself!
  3.  Bring a large pot of salted water to a boil. Combine bread, a garlic clove and remaining olive oil in a food processor. Process until fine crumbs are formed. Transfer to a medium skillet and cook over medium-high heat, stirring and tossing constantly until golden brown. Transfer to a small bowl. Season bread crumbs to taste with salt and pepper and add a pinch of parsley and chives. Toss to combine. Set aside.
  4.  Add crab and optional sliced chilies to saucepan with sauce and stir to combine. Cook spaghetti in boiling salted water just until it is barely cooked through, about 2 minutes (if using dry pasta, cook according to package directions). Drain pasta, reserving 1 cup of cooking liquid. Transfer pasta to saucepan with sauce stir in remaining herbs. Heat over high heat until sauce is simmering and pasta is completely coated, adding reserved pasta water as necessary to thin sauce to desired consistency. Serve immediately, topping with bread crumbs.


Filed Under: Dinner Tagged With: crab, dinner, pasta, seafood, tofino

All Hail the Sandwich King: The Havarti Dill Salmon Melt

November 15, 2013 by Eva Louise 1 Comment

awesomeness

We’ve discussed this before but let me reiterate – Stingray is the supreme sandwich maker as evidenced by this post. No, but actually… he is.   He’s detail oriented and patient enough to make my sandwich just the way I like it. Don’t even get me started on his egg sandwiches…*eyes cross in ecstasy*

Anyway, I called him from work the other night and asked him to make me a delicious dinner (I do all the cooking, therefore I can demand this on the occasion) and this is what the genius came up with: an open-faced salmon melt with Havarti dill and a lemon aioli.  To make it a meal, we heated up some roasted vegetable soup, and I made a refreshing side salad of watercress with lemon juice and a zesty aioli to drizzle on the sandwich. It was heavenly.

amazing mealmoneyshotdelicious aoiliaioli

Salmon Melt with Havarti Dill and Lemon Aioli

Makes 2 

  •  2 fillets of 4-6 oz. salmon (Pacific salmon if you can get it)
  • 1 t Paprika
  • ½ t Cayenne
  • 1 t Italian seasoning
  • 1 t Herbs de Provence or some other hearty spice mix
  • Juice of ½ lemon
  • 2 T olive oil
  • S/P
  • 2 slices of fresh chewy bread
  • ¼ cup grated Havarti, or 2 slices from the deli
  • 2 T finely chopped dill

Preheat oven to 375

In a bowl mix paprika, cayenne, Italian seasoning, Herbs de Provence, lemon juice and olive oil until it’s a loose paste.  Add a pinch of salt and pepper.  Taste and adjust flavoring; the mixture should be very salty and intense.

Rinse the salmon, pat dry and season with a generous pinch of salt and pepper.  If the skin is still on, leave it; the meat will lift away easily from the skin after it bakes.

Drizzle the bottom of a stone or glass dish (oven-proof obviously) with olive oil and place the salmon in the center of the dish, flesh side up.  Pour the herby paste mixture over  the salmon. Tuck the de-juiced lemon half next to the salmon for extra flavor and cover with aluminum foil and bake.  Depending on the thickness of the salmon, it should take about 15-20 minutes. A single, thinner fillet may only take  about 10-12 minutes. Hint: White tear drops will start to form on and around the salmon when it’s ready. Don’t be afraid to under cook the fillets slightly because next up is the broiler once the sandwich is assembled.

After they’re baked, keep the salmon fillets warm under the foil on a plate. Chuck the roasted lemon.

Lightly butter the 2 slices of chewy country bread.  Heat a pan to medium-high and toss on the buttered slices. Heat until golden brown.

On a cookie sheet, assemble the sandwiches by placing the slices of bread in the center of the cookie sheet, then a fillet of salmon on each slice. If the salmon is too thick, or looks awkward and block-ish, fan it out across the bread. The fillet will break apart naturally. Mix the fresh chopped dill with grated Havarti and sprinkle generously over the salmon.

Broil the open face sandwiches for about 3 minutes.  Check on them constantly so they don’t burn! They’re ready when the cheese is golden and bubbly and the oven hasn’t caught fire. #winning

Serve with a lemon aioli (recipe below),  a piping hot soup and a cool, crisp salad and you’re ready to go!

Lemon Aioli 

  • juice of 1/2 lemon
  • 2 T mayonnaise
  • 1 T finely chopped dill
  • cracked pepper

No magic here, mix all ingredients together until smooth and yummy. Adjust flavors as needed, serve with your delicious sandwich.


Filed Under: Dinner Tagged With: cheese, dinner, lunch, Main, salmon, sandwich, sauce, seafood

Insta(gram) good: Baked stuffed peppers with brown rice and spinach

October 28, 2013 by Eva Louise 1 Comment

smokshow peppers

As my brother would say, this dish is a total smokeshow…OK, I think he uses that in reference to chicks, but let’s diversify its meaning. I wasn’t planning on posting this on the bloggy but one of my friends just asked for the recipe on Instagram and then I realized that I’d like to remember how I made this too! I really hate peppers and I really hate brown rice but for some reason I always crave this dish, especially after the gym. It’s quick, easy, hearty, healthy and vegetarian…oh, and cheap, that’s always a plus. What’s not to love? Here’s what you need to make: Baked Stuffed Peppers with Brown Rice, Spinach and Pepper Jack Cheese.

Makes 2 really huge post-gym servings

  • 3/4 dry cup of brown rice, cooked per instructions (yields about 1.5 cups, cooked)
  • 1.5 cup sour cream
  • 3/4 cup grated pepper jack cheese
  • 2 medium white onions, diced
  • 3 garlic cloves, or if you’re me, 5 cloves
  • 2 packages frozen spinach, defrosted and drained
  • 3 beautiful bell peppers, tops cut off and ribs removed or cut in half with ribs removed
  • smoked paprika
  • cayenne pepper
  • S/P

Pre-heat oven to 350.

In a large, shallow pot, heat 2 T olive oil at medium-high heat. Add diced onions and crushed or pressed garlic cloves. Soften for about 5-7 minutes. Add salt and pepper to taste.

Reduce heat to medium-low. Take the spinach by hand and break apart into the pot and mix in with the onion-garlic mixture. Fold in the cooked brown rice, sour cream and 1/2 cup of the pepper jack, reserving the rest for the tops of the stuffed peppers.

Sprinkle about 1.5 T of smoked paprika and a few shakes of cayenne depending on your preference over the mixture.  Adjust flavors accordingly, it might need more salt and more garlic at this point.

While the spinach, cheese and sour cream warm, line a cookie sheet or casserole dish with tin foil, placing the bell pepper halves snuggly together, insides facing up. Salt the bell pepper halves lightly; no need for oil as there is enough moisture in the peppers to keep them from sticking or burning.

Spoon the delicious mixture into each of the pepper halves, packing it down as you go. Sprinkle the remaining pepper jack cheese over the stuffed peppers and bake in the oven until golden brown and fragrant, about 30-35 minutes.  Serve as is, or with shrimp, chicken or salmon.

Follow me on Instagram @evalou for more!

Filed Under: Dinner, Sides Tagged With: cheap eats, cheese, cooking, fall, food, healthy, recipes, rice, side dish, vegetarian

Put this in your pipe and smoke it! No, no, please just eat it with some cream cheese

August 23, 2013 by Eva Louise 4 Comments

candy1candy2

So you’re probably wondering, Evey, what’d you do with that Coho you slaughtered in your last post? I’ll tell you what we did, we made smoked salmon of course…we’re Jews after all…! Our smoked salmon is insanely delicious, meaty, brine-y and flavorful, not those slimy, thin, hot pink lox you get at the deli.  

accoutrements

All the accompaniments are just as essential as the smoked salmon: cream cheese, capers, red onion, tomatoes and lemons.

Obviously I’ll never make this in my New York apartment, but I would like to have this recipe on file. It’s funny because as I’m typing, I’m looking in the guest book of our Tofino house (we keep a guest book/journal every year so we can remember everything, recipes included) and apparently Dad calls this recipe his “Lil’ Chief Smoked Salmon Deluxe,” so we’ll continue to call it that.

Lil’ Chief Smoked Salmon Deluxe

salmonsalmon2

The process is quite long (about 13 hours door to door NOT including actually catching the fish) but nice and easy if you have the time and a smoker.  We start with a super intense brine with the ingredients below. Mom and Dad will adjust the recipe depending on what’s in fridge but you get the idea.  We leave the fillets to brine for about 4 hours in the fridge, then leave it to air dry on the counter until it forms the pellicle – that glossy, salty seal on the top of the fish which apparently helps the smoke adhere to the fish more effectively. Then we smoke it in our smoker (looks like a mini-bar fridge) for 6-8 hours at different temperatures (below). I might not be able to smoke the fish back in New York but I sure can eat it back in New York! Going to have to have you all over for brunch soon…

For the Brine

  • 1 cup water
  • 2 cups soy sauce
  • 1/4 cup non-iodized salt
  • 1/3 cup brown sugar
  • 1 cup dry white wine
  • 1/4 cup lemon juice
  • crushed garlic (knowing my family, a whole bulb)
  • onion powder or chopped onions

Smoke for:

  1. 1-2 hours at 100-120F
  2. 2-4 hours at 140F
  3. 1-2 hours at 175F

Filed Under: Breakfast, Dinner Tagged With: British Columbia, Canada, cooking, fish, food, recipe, salmon, seafood, smoking, tofino, tofino time

Israel Homecoming

August 12, 2013 by Eva Louise 1 Comment

jewish roadview

camels

I’m back from the motherland – the beautiful, complex country of Israel! I was there this past week for 10 days on a Taglit Birthright Trip getting my Jew on. I was carted around the Jersey-sized country, to Tel Aviv, to Jerusalem, to the Golan Heights and to the Negev Desert in a big ol’ tour bus with 39 other Jews. I don’t doubt we barely scratched the surface of Israeli exploration, but I really felt like I experienced a lot of the country…And most importantly, I can say I ate my weight in hummus and shwarma on this trip.

I had high expectations for the food there, and save for a few janky Kibbutz meals, I was seriously impressed.  My three highlights were Shakshuka, Ahi Tuna Fish ‘n’ Chips, and of course, ze Shwarma. Seriously, I freaking love shwarma. While there is no way I’d ever attempt making it, I can’t wait to attempt the Shakshuka and Tuna Fish ‘n’ Chips!

Photo credit shout out to my amazing new friend Justin Drazin, author of the Pillow Monster Series. (He took the pretty pictures, I took the food pictures.)

Shakshuska

Eggs baked in a scrumptious tomato, onion, pepper, herb mixture served with side salads and crusty bread.

Shakshuka

Kosher Ahi Tuna Fish ‘n’ Chips with Curry Mayo

Only the most brilliant riff on fish ‘n’ chips ever in the history of man.

ahifish and chips

Shwarma

Just…yea. Mmmm. Mmm. Mm!

shwarma

Some other amazing images from our adventures:

cave

Inside a water cistern at Masada

The Kotel at Dusk

The Kotel at Dusk

Farm land, Syria in the distance

Syrian farmland, view from Golan Heights

I want them all

I want them all

Grapes almost ready for harvest

Grapes almost ready for harvest

Shalom, Tel Aviv!

Shalom, Tel Aviv!

No Jew trip would be complete with a Jew nose pic

In case there was any doubt…I’m definitely a Jew!!

Filed Under: Dinner, Life & Travel Tagged With: birthright, breakfast, cooking, eating, eggs, fish, food, Israel, Jerusalem, Jewish, judaism, Middle East, recipes, religion, seafood, summer, Tel Aviv, travel

End of the Heat Wave!: Asparagus Ravioli with Seared Scallops

July 24, 2013 by myfriendsinfood 2 Comments

scallops and ravioli

We’ve just survived a brutal, swassy heat wave here in New York and  I swear, you couldn’t pay me to cook in my kitchen these days.  Luckily, protein bars and happy hours  have been sustaining me, but man, I’m really fiending some of my own food.

I started flicking through some of the dozens of unposted food photos I have on file and picked this homemade asparagus ravioli with lemon zest and mascarpone with seared scallops to share today. I made this earlier in spring time, at the beginning of asparagus season and cheated by using wonton papers which I’ve used for other recipes as well. (Link to that post here)  I’d love to try this with ramps or garlic scapes (maybe too late in the season??), or some other funky farmers market vegetable. I’ll definitely be trying this dish again.

Asparagus Ravioli with Lemon Zest and Mascarpone 

scallops and ravioli 2

  • zest of 1lemon
  • juice of 1 lemon
  • 1 bunch asparagus
  • 1 small dish of mascarpone cheese (about
  • block of Pecorino or Parmesan
  • 1 bunch chives, finely chopped
  • 2 cloves garlic (optional), smashed or rough chopped
  • S/P to taste
  • wonton papers

Rinse and pat dry the bunch of asparagus and cut each stalk just below the crown.  Set the crowns aside for garnish later*. Cut and discard the dried or discolored bottoms of the stalks. These are normally dry and tough and not tasty. Rough chop the remaining stalks and toss into a food processor.

To the food processor, also add: 2 cloves of rough chopped garlic, a handful of chopped chives (they are so mild I love using a lot), 1 teaspoon of lemon zest, 4 – 6 Ts of the mascarpone, 1/4 cup of pecorino, cracked pepper (hold on the salt until you taste the blended mixture). Pulse the mixture in the processor until mostly smooth and incorporated. Taste and adjust flavors accordingly. Salt, more garlic or more cheese might be necessary.  The consistency should be a bit stiff and asparagus-y; you don’t want the creaminess of the cheese to drown out that flavor, or for the filling to be too soggy.

Once the filling is a good consistency, prepare your station and start assembling your raviolis. For this, you need:

  • a big plastic cutting board
  • a drying rack (wipe with oil or spray it with Pam to keep the raviolis from sticking)
  • small ramekin of water

Lay out the wonton papers onto the cutting board and place a small dollop of filling in the middle. Dip your finger in the ramekin of water and wet the edges of the paper.  At this point you can either fold the wonton into a triangle, or place another wonton paper on top (recommended) to keep its square shape.  Make sure the edges are sealed fully and place on the drying rack.

Once all the raviolis are assembled and drying, boil water a shallow pot. Add salt and one layer of raviolis. Cook 2-4 minutes until the wonton paper is tight around the filling. Continue to cook the rest of the raviolis (or freeze the remainder). Use a slotted spoon to place on a pretty platter or on individual plates.

*In a saute pan,  heat a generous splash of olive oil and saute the reserved asparagus crowns with a few pinches of the chives for 2-3 minutes until al dente. Distribute evenly among the plated raviolis. 

Garnish the asparagus ravioli with lemon juice, lemon zest, chives, and pecorino. The pasta water, olive oil and lemon juice will naturally create the sauce for the dish. I served mine with seared scallops, but chicken or salmon would be awesome as well!

Filed Under: Dinner, Pasta & Grains, Sides Tagged With: asparagus, cheese, cooking, food, lemon, New York City, pasta, ravioli, recipes, scallops, seafood, summer

  • Go to page 1
  • Go to page 2
  • Go to page 3
  • Go to Next Page »

Primary Sidebar

Don't miss a post!

Enter your email to subscribe and receive notifications of new posts by email.

Welcome

I’m Eva Louise and welcome to Mind in the Butter! This is my food bloggy, showcasing my favorite dishes and recipes often inspired by and cooked for my loved ones. My goal with this blog is to eventually document every single dish I make so when I’m old and stale, I will be able to remember and celebrate memories from my favorite place…the kitchen!

Recent Posts: Mind in the Butter

Shulamit’s Unreal Lasagna with Ground Beef and Spinach

Best-ever 4 minute Instant Pot Rice

Best-ever 4 minute Instant Pot Rice

Seared Scallops and Fennel Risotto

Seared Scallops and Fennel Risotto

Palm Springs: the World’s Best Jetlag Cure

Palm Springs: the World’s Best Jetlag Cure

The Karmic Boomerang is real! New Year, new beginning for me

The Karmic Boomerang is real! New Year, new beginning for me

Copyright © 2023 · Foodie Pro & The Genesis Framework