• Skip to primary navigation
  • Skip to main content
  • Skip to primary sidebar

Mind in the Butter

Food for taste, buds, and family

  • Recipes
    • Appetizers & Snacks
    • Breakfast
    • Desserts
    • Dinner
    • Drinks & Cocktails
    • Instant Pot
    • Pasta & Grains
    • Salads & Vegetables
    • Seafood
    • Sides
    • Soups & Stews
  • Entertaining
    • Holidays
  • Life & Travel
  • Food & Sustainability

Sides

Best-ever 4 minute Instant Pot Rice

October 25, 2018 by Eva Louise Leave a Comment

If Ray could live off one food for the rest of his life, hands down it would be rice (Ok…and lamb). I was historically impartial to rice (I’m a mashed potatoes kind of girl), but I was forced to fall in love with it during my pregnancy once I started slowing down and had to pass the dinner-making reins to Ray. The important thing to know about him is he has 2 speeds in the kitchen:

1) a slow cooked simmered something that requires to be served over rice and;

2) the trifecta: protein on grill + sautéed greens + well…rice.

So it was safe to assume that from April to August, I ate rice for dinner. Therefore it’s also safe to assume that Sebastian is made of 50% rice…and conservatively 50% Ben & Jerry’s New York Super Fudge Chunk.

Ray is a man of simple pleasures and simple flavors so my best-ever 4 minute Instant Pot Rice is inspired by his with an Eva flare (read: just more spices). It’s a great base recipe with infinite ways to pump it up, so I have full confidence this will become a go-to dish in your house no matter what.

By the way, we’re those weirdos who are obsessed with their Instant Pot , who always want to sell everyone on the glory, the magic that is the Instant Pot. Like, you can’t come into my kitchen until you sit through my infomercial about this amazing appliance. So I’m telling you, this is a recipe for THE perfect, most flavorful, fragrant rice and the Instant Pot does all the heavy lifting. Also… if you DON’T own one of these or even worse, you own one and don’t use it every night (hi, Marina!) then you’re not living your best life. You’re just not and I can’t even argue with you about it, it’s just fact. OK?

Print

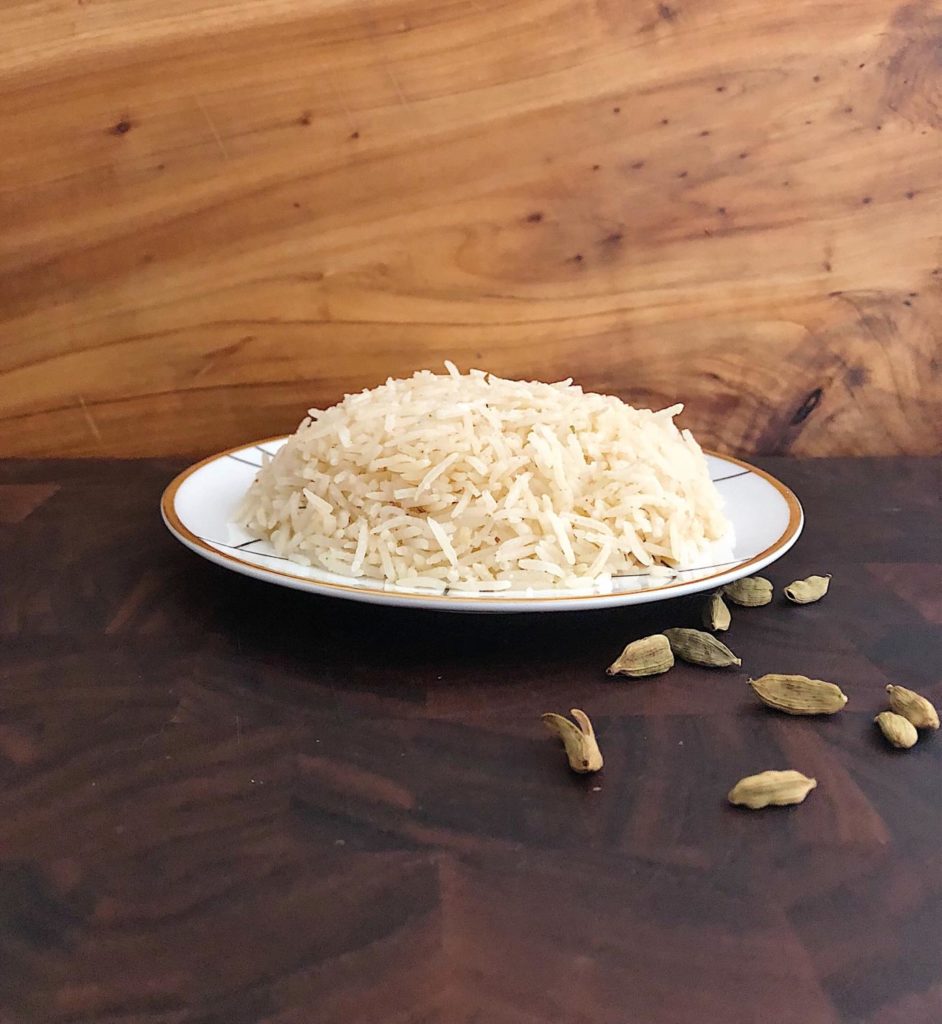
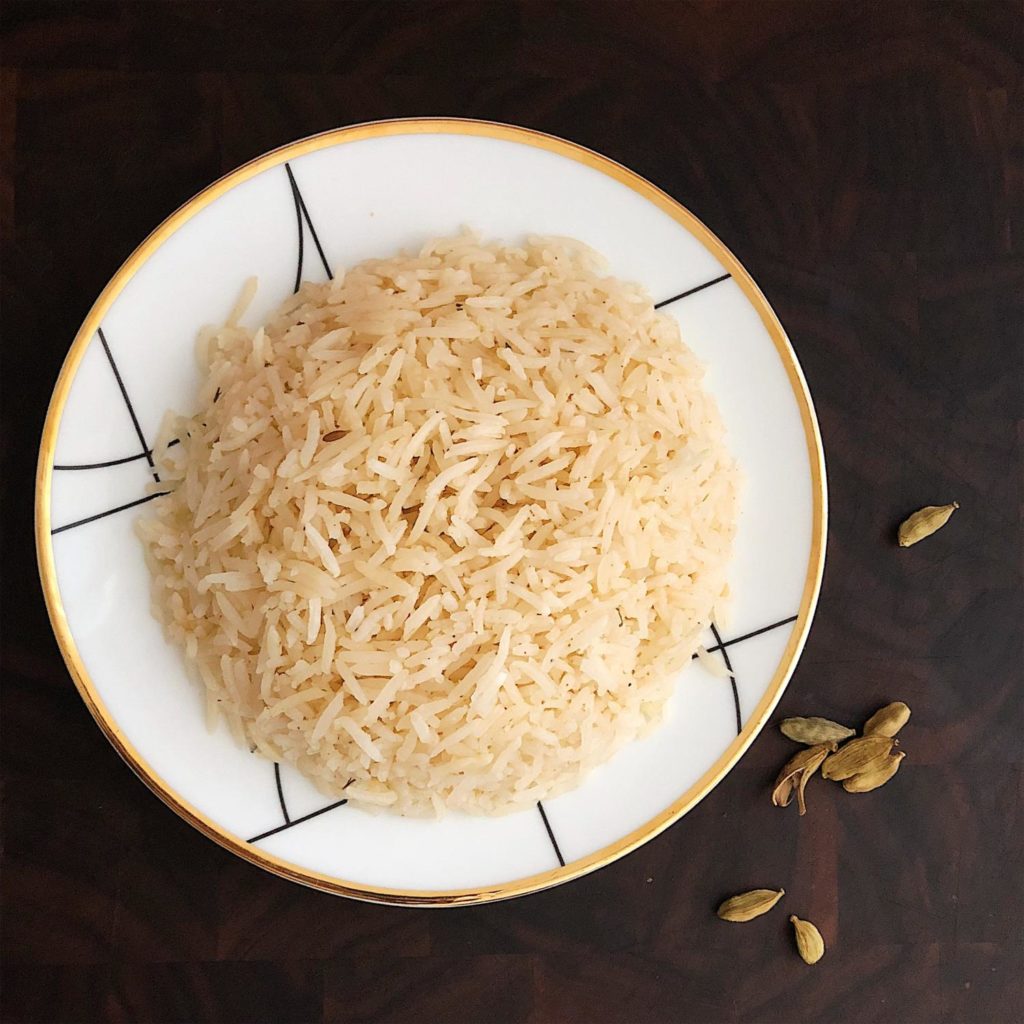
Fragrant 4-minute Instant Pot Rice

Prep 2 mins

Cook 4 mins

Inactive 10 mins

Total 16 mins

Yield 4-6 servings

Ingredients

  • 1 cup thoroughly rinsed basmati or jasmine rice
  • 1 cup chicken stock (or any stock). 
  • 1 T olive oil
  • 4 cardamom pods, broken open
  • 2 tsp cumin seeds (ideally toasted but not required)
  • pinch of salt
  • 1 bay leaf

Instructions

  1. Place all ingredients in the Instant Pot and stir.
  2. Close lid and valve and set to "pressure cook" on high for 4 minutes.
  3. Once cooked, release pressure valve and let sit for additional 10 minutes. DO NOT take off lid until 10 minute resting period is done. Sip wine, set the table, call your mom while you wait.
  4. Fluff and serve.

Notes

If you don't have stock or broth on hand you can stir one heaping teaspoon of "Better Than Boullion" into warm water as a replacement.

Courses Dinner


Filed Under: Pasta & Grains, Recipes, Sides Tagged With: easy, instant pot, rice, sides

Springtime Delight: Ramp Pesto Polenta with Morel Mushrooms

May 15, 2014 by Eva Louise Leave a Comment

raw ramps

I’m back in New York this week from a business trip in Nigeria and I’m still lusting over this ravishingly rampy polenta I made for Stingray and me right before I left. He’s eating meat again (praise, Jesus!…I’m Jewish, but whatever) so I convinced him to make his luscious oven-roasted chicken to accompany my side dish. I can’t wait to get back in the kitchen this week!

Ramp Pesto Polenta with Morel Mushrooms

polenta finished product


chicken platterServes 4 generous portions

  • 1.5 cups polenta
  • 3 cups water
  • 1 small container of Greek yogurt
  • 1/2 cup Pecorino Romano
  • 1/2 cup fresh morel mushrooms
  • 2 gloves garlic

For the pesto:

  • 1 bunch fresh ramps, rinsed
  • 1/2 cup toasted pine nuts
  • 1/4 cup Pecorino Romano
  • zest and juice of 1/2 lemon
  • 1/4 cup olive oil
  • S/P to taste

Rough chop ramps and toss into food processor with pine nuts, cheese, lemon juice and zest.  While food processor is running, drizzle in olive oil until mixture is proper, creamy, pesto consistency. Add salt and pepper and add more lemon juice or olive as needed. Set aside.pesto1pesto2

Cook polenta per box instructions. General rule is usually 1 part polenta to 2 parts water/milk. Boil water and slowly add in polenta. Be sure to stir constantly so it doesn’t get clumpy. Reduce heat and let simmer until cooked (5-7 minutes approx).

Fold in container of Greek yogurt and Pecorino. Add salt and pepper to taste.  I added a pinch cayenne to mine, it was nice. Turn off heat and push to back burner.

Heat medium-sized pan to high heat. Add 1 T of butter and splash of olive oil so butter doesn’t burn. Add morels and let sear for 1-2 minutes before poking with a spoon. Once tender and brown, crush 1-2 cloves of garlic into the mushrooms and let soften 1-2 more minutes.

Pour polenta on a beautiful dish, spoon ramp pesto on top and finish with the morel mushrooms and you’ve got the taste of Springtime for supper!

Filed Under: Sides Tagged With: Italian, ramps, side dish, spring, vegetables

Insta(gram) good: Baked stuffed peppers with brown rice and spinach

October 28, 2013 by Eva Louise 1 Comment

smokshow peppers

As my brother would say, this dish is a total smokeshow…OK, I think he uses that in reference to chicks, but let’s diversify its meaning. I wasn’t planning on posting this on the bloggy but one of my friends just asked for the recipe on Instagram and then I realized that I’d like to remember how I made this too! I really hate peppers and I really hate brown rice but for some reason I always crave this dish, especially after the gym. It’s quick, easy, hearty, healthy and vegetarian…oh, and cheap, that’s always a plus. What’s not to love? Here’s what you need to make: Baked Stuffed Peppers with Brown Rice, Spinach and Pepper Jack Cheese.

Makes 2 really huge post-gym servings

  • 3/4 dry cup of brown rice, cooked per instructions (yields about 1.5 cups, cooked)
  • 1.5 cup sour cream
  • 3/4 cup grated pepper jack cheese
  • 2 medium white onions, diced
  • 3 garlic cloves, or if you’re me, 5 cloves
  • 2 packages frozen spinach, defrosted and drained
  • 3 beautiful bell peppers, tops cut off and ribs removed or cut in half with ribs removed
  • smoked paprika
  • cayenne pepper
  • S/P

Pre-heat oven to 350.

In a large, shallow pot, heat 2 T olive oil at medium-high heat. Add diced onions and crushed or pressed garlic cloves. Soften for about 5-7 minutes. Add salt and pepper to taste.

Reduce heat to medium-low. Take the spinach by hand and break apart into the pot and mix in with the onion-garlic mixture. Fold in the cooked brown rice, sour cream and 1/2 cup of the pepper jack, reserving the rest for the tops of the stuffed peppers.

Sprinkle about 1.5 T of smoked paprika and a few shakes of cayenne depending on your preference over the mixture.  Adjust flavors accordingly, it might need more salt and more garlic at this point.

While the spinach, cheese and sour cream warm, line a cookie sheet or casserole dish with tin foil, placing the bell pepper halves snuggly together, insides facing up. Salt the bell pepper halves lightly; no need for oil as there is enough moisture in the peppers to keep them from sticking or burning.

Spoon the delicious mixture into each of the pepper halves, packing it down as you go. Sprinkle the remaining pepper jack cheese over the stuffed peppers and bake in the oven until golden brown and fragrant, about 30-35 minutes.  Serve as is, or with shrimp, chicken or salmon.

Follow me on Instagram @evalou for more!

Filed Under: Dinner, Sides Tagged With: cheap eats, cheese, cooking, fall, food, healthy, recipes, rice, side dish, vegetarian

Committing food mutiny with bulgur, eggplant, pomegranate and feta

October 1, 2013 by Eva Louise 3 Comments

bulgarsalad

There are some meals I steer away from cooking because Stingray doesn’t like certain ingredients. Since I’m the best girlfriend ever, I almost exclusively cook in line with his tastes, but the other night I threw down my apron and got all HMS Bounty on his ass. He wasn’t happy; here’s what happened:

“Damnit, Stingray, that’s it! Tonight, I’m giving you the triple threat!” I bark.

Stingray gasps in horror and then, with closed eyes he pleads, “Oh, but Evie, what does that mean?! You’re going to feed me something I despise?!”

“Yes, Stingray. The time is now for you to eat your three least favorite foods: eggplant, pomegranate and…”

“Wait… Evie, what?! It’s not…no!” Now on his knees leaning on the fridge to steady himself, Stingray whispers, “It can’t be…”

“Oh yes, yes it is. Feta. Sheep’s milk feta.“

“Nooooooo!” Stingray screams with his fist to the air, camera zooms out,  as Eva walks triumphantly to the grocery store.

Ok, none of that actually happened but Stingray really hates eggplant and feta, but this week I didn’t care because I got this great idea to make a warm bulgur salad with roasted eggplant, garlic, onions served with pomegranate and sheep’s milk feta. It was awesome.

salad

Serves 4

Ingredients

  • 1 cup bulgur
  • 2 cups water
  • 1 medium/large eggplant
  • 2 small white onions or 1 large one
  • 6-8 cloves of garlic
  • 1 cup pomegrnate seeds
  • sheep’s milk feta
  • juice and zest of 1 one lemon
  • seasoning: salt, pepper, cayenne, italian seasoning, fine herbs

Pre-heat oven to 375.

Chop onions and eggplant into about 1 inch cubes and lay in foil-lined cookie sheet. Whack the 6 cloves of garlic with a knife and add to the onion-eggplant mixture.  Season generously with salt, pepper, cayenne, Italian Seasoning, and Fine Herbs (if you have them) and olive oil.  Toss with your hands to ensure the vegetables are coated with oil and seasonings.

Bake at 375 for about 20 minutes or until caramelized.

Heat 2 cups of water and 1 cup Bulgar in medium pot until boiling, reduce heat and simmer, mixing occasionally until cooked, about 10 minutes.

Once cooked, fold the eggplant, onion, garlic mixture as well as the juice of one lemon.  Taste before serving on pretty platter.  Garnish with lemon zest, crumbled feta and pomegranate seeds.

Food mutiny complete!

Filed Under: Sides Tagged With: cheese, cooking, eggplant, food, grains, greek, mediterranean, recipes, salads, sides, vegetables

Lend me your ears!…for some Eva-style Elote

August 29, 2013 by Eva Louise 9 Comments

DSC_0543DSC_0544

I don’t really like ears of corn. There’s something so cumbersome about the way they look that turns me off…as in, they look like a real commitment to prepare and eat. You know? No? OK, yea, I forgot that everybody else on the planet freakin’ loves corn…Which means I need to have a few corn recipes in my repertoire. FINE.

Luckily, my Mom decided to buy a million ears of it for our recent trip to British Columbia, so this was the perfect time to practice. I decided to do a riff on elote, Mexican street corn and used our BBQ to char the corn before preparing the dish. Not revolutionary, but it took the dish to a totally stellar level.

Eva-style Elote

Ingredients

  • 3 ears of  corn, husks off, stub on (makes it easier to BBQ)
  • 1/2 medium red onion, diced
  • 1 bunch cilantro, rinsed and roughly chopped
  • 1 can black beans, rinsed
  • 2 heaping dollops of crema (Mexican sour cream), creme fraiche (French sour cream) or just regular sour cream
  • 1 heaping T mayonnaise
  • 1/4 cup crumbled cotija cheese or grated Parmesan
  • juice of 1 juicey lime
  • pinch of cayenne pepper
  • 1 ripe avocado

Char the ears of corn for about 8-10 minutes on a seriously hot grill or griddle pan, probably, 375-400 degrees. Let them cool long enough to take a knife to chop off the kernels.  Reserve a small bunch of kernels, cotija, cilantro and avocado for garnish later, then mix corn with all of the other ingredients EXCEPT the avocado.  Careful on the mayo and crema to make sure you don’t add too much. Taste and adjust flavors accordingly. Fold in the diced avocado near the end so it doesn’t squish. Cover and refrigerate for about 30 minutes. Garnish the mixture with the remaining corn, cotija, cilantro and avocado, then serve!

DSC_0542

Filed Under: Life & Travel, Sides Tagged With: British Columbia, Canada, cheese, cooking, corn, Elote, food, Mexican food, recipes, salads, sides, summer, tofino, vegetables

End of the Heat Wave!: Asparagus Ravioli with Seared Scallops

July 24, 2013 by myfriendsinfood 2 Comments

scallops and ravioli

We’ve just survived a brutal, swassy heat wave here in New York and  I swear, you couldn’t pay me to cook in my kitchen these days.  Luckily, protein bars and happy hours  have been sustaining me, but man, I’m really fiending some of my own food.

I started flicking through some of the dozens of unposted food photos I have on file and picked this homemade asparagus ravioli with lemon zest and mascarpone with seared scallops to share today. I made this earlier in spring time, at the beginning of asparagus season and cheated by using wonton papers which I’ve used for other recipes as well. (Link to that post here)  I’d love to try this with ramps or garlic scapes (maybe too late in the season??), or some other funky farmers market vegetable. I’ll definitely be trying this dish again.

Asparagus Ravioli with Lemon Zest and Mascarpone 

scallops and ravioli 2

  • zest of 1lemon
  • juice of 1 lemon
  • 1 bunch asparagus
  • 1 small dish of mascarpone cheese (about
  • block of Pecorino or Parmesan
  • 1 bunch chives, finely chopped
  • 2 cloves garlic (optional), smashed or rough chopped
  • S/P to taste
  • wonton papers

Rinse and pat dry the bunch of asparagus and cut each stalk just below the crown.  Set the crowns aside for garnish later*. Cut and discard the dried or discolored bottoms of the stalks. These are normally dry and tough and not tasty. Rough chop the remaining stalks and toss into a food processor.

To the food processor, also add: 2 cloves of rough chopped garlic, a handful of chopped chives (they are so mild I love using a lot), 1 teaspoon of lemon zest, 4 – 6 Ts of the mascarpone, 1/4 cup of pecorino, cracked pepper (hold on the salt until you taste the blended mixture). Pulse the mixture in the processor until mostly smooth and incorporated. Taste and adjust flavors accordingly. Salt, more garlic or more cheese might be necessary.  The consistency should be a bit stiff and asparagus-y; you don’t want the creaminess of the cheese to drown out that flavor, or for the filling to be too soggy.

Once the filling is a good consistency, prepare your station and start assembling your raviolis. For this, you need:

  • a big plastic cutting board
  • a drying rack (wipe with oil or spray it with Pam to keep the raviolis from sticking)
  • small ramekin of water

Lay out the wonton papers onto the cutting board and place a small dollop of filling in the middle. Dip your finger in the ramekin of water and wet the edges of the paper.  At this point you can either fold the wonton into a triangle, or place another wonton paper on top (recommended) to keep its square shape.  Make sure the edges are sealed fully and place on the drying rack.

Once all the raviolis are assembled and drying, boil water a shallow pot. Add salt and one layer of raviolis. Cook 2-4 minutes until the wonton paper is tight around the filling. Continue to cook the rest of the raviolis (or freeze the remainder). Use a slotted spoon to place on a pretty platter or on individual plates.

*In a saute pan,  heat a generous splash of olive oil and saute the reserved asparagus crowns with a few pinches of the chives for 2-3 minutes until al dente. Distribute evenly among the plated raviolis. 

Garnish the asparagus ravioli with lemon juice, lemon zest, chives, and pecorino. The pasta water, olive oil and lemon juice will naturally create the sauce for the dish. I served mine with seared scallops, but chicken or salmon would be awesome as well!

Filed Under: Dinner, Pasta & Grains, Sides Tagged With: asparagus, cheese, cooking, food, lemon, New York City, pasta, ravioli, recipes, scallops, seafood, summer

Lemon-Tahini Dressed Kale with Pine Nuts and Cranberries

April 28, 2013 by Eva Louise 1 Comment

kaleThese days I’m addicted to kale and totally over my normal vinaigrette go-tos: homemade apple cider and balsamic vinaigrette, so I tried my hand at a lemon-tahini dressing.  I always feed bad for that lonely can of tahini that sits in my fridge after I’ve gotten the urge to make humus–the only reason I can normally think to use sesame paste. With this new addition, that sad old can is put to good use with this kale salad tossed with toasted pine nuts and cranberries.

Lemon-Tahini Dressing

  • juice of 1 lemon
  • 1 heaping tablespoon tahini
  • 3 tablespoons of water
  • 1 tablespoon olive oil
  • pinch of salt
  • pinch of paprika
  • crushed garlic clove

Filed Under: Sides Tagged With: cooking, dressing, food, fruit, nuts, recipe, salad, vegan, vegetables, vegetarian

Lovers and Friends: Beets and Goat Cheese

April 9, 2013 by Eva Louise 1 Comment

beetsBeets are fun to cook, I’ve decided. They gush a bloody red; they’re firm enough after they’re cooked that you can really play with them to create a beautiful presentation. Here, I made super easy gold and red beet stacks with creamy chive goat cheese and toasted pine nuts. The sweetness of the beets, the tang of the goat cheese and the bite from the chives are a dangerous trifecta of delicious. I’ll likely make these again soon, but in mini skewered versions for a cocktail party. Will report back after successful completion.

Gold and Red Beet Stacks with Chive Goat Cheese and Pine Nuts

  • 3 red beets
  • 2 large gold beets
  • 1 large log goat cheese, coldish room temperature
  • 1/4 cup of heavy cream
  • 1 bunch chives, finely chopped
  • some toasted pine nuts

1) Chop the tips off of the beets and boil whole until tender, about 20 minutes. A knife should easily go through them when ready. Place beets in bowl of ice water. Cool completely and peel. I’m not sure the proper way to peel a beet, but I ran my nail under the beet skin and it came off pretty easily, almost like peeling a boiled egg. Don’t do this if you’re a hand model before a photo shoot. Slice into 1/4 inch slices and set aside.

2) In a small bowl mix goat cheese and heavy cream, pouring small amounts of cream at a time to avoid it from splashing around. Fold in most of the chives, leaving some for garnish. It feels like you’re adding a lot, but chives have mild flavor. Add salt and pepper and taste.

3) In a small pan, toast 1 handful of pine nuts on medium heat until golden brown. Shake the pan frequently to avoid burning. Takes about 2-3 minutes.

4)  On a pretty plate, create the beet “stacks” by alternating 1 slice of beet and 1 dollop of cheese mixture, about three times. Get creative and make something pretty.

5) Garnish with chives and pine nuts and serve either as is, or with arugula, spinach or another tasty leafy green tossed with lemon juice and olive oil.

Filed Under: Sides Tagged With: appetizer, cheese, food, recipe, salad, spring

Just for the Halibut: Lager-battered Fish Sandwich with Garlic Truffle Fries

February 13, 2013 by Eva Louise 4 Comments

photo (6)This week, Stingray and I made use of two snow-white halibut fillets we had in the freezer (fate of the second fillet to be revealed tomorrow). I was lucky enough to have him make me this outrageous fried fish sandwich for Sunday supper. Despite having a reputation for being the ultimate convenience food, sandwiches are actually a luxury dinner item at our house.  They often require ingredients that we don’t keep on file (bread and sliced cheeses),  and require a keen attention to detail to make them extra tasty (hence why he cooked and I didn’t). Stingray did a basic beer batter for the fish, with classic accompaniments: lettuce, tomato, sliced cheese. He hit it out of the park by buttering and toasting both sides of the bun before serving. I was feeling kind of useless in the kitchen, so my contribution was a  dill aioli and some garlic truffle fries.

For the batter:

  • 1 bottle lager
  • 1 Tbsp baking powder
  • 1/8 tsp ground black pepper
  • Dash cayenne pepper
  • 1 tsp seasoned salt
  • 1 tsp fish seasoning
  • ¾ cup all-purpose flour, plus ½ cup
  • Canola or vegetable oil

1. In a large bowl, mix together the beer, baking powder,  pepper, cayenne pepper, seasoning and salt. Whisk in the flour until the mixture resembles thin pancake batter, add more flour if needed.
2. Fill a medium-sized pan with about a ½ inch of  oil and heat over medium-high until it begins to shimmer. Season the halibut, dredge lightly in the ½ cup of flour (helps the batter to stick), dip it into the batter, and cook the fish until crispy and flaky, 4 to 6 minutes, flipping halfway through. Remove the fillets and rest on paper towel lined plate, pat gently to coax away excess oil.

For the aioli:

  • 3/4 cup mayonnaise
  • 1-2 crushed cloves garlic
  • 1 lemon (juice and zest)
  • 1/2 cup dill, finely chopped
  • s/p to taste
  • 2 T olive oil

Add all ingredients to food processor, blend until smooth.  Taste, and adjust flavors as you like. Smear on toasted buttered buns before stacking fish fillet, cheese, tomato, lettuce.

Garlic Truffle Fries

  • 2 blemish-free Russet potatoes
  • 4 cloves garlic
  • olive oil
  • 4 T finely chopped parseley
  • truffle salt
  • truffle oil
  • s/p to taste

1. Place cookie sheet in oven and crank  to 400. Slice potatoes into long wedges. In a large bowl, coat potato wedges liberally with olive oil. Mix in 2 cloves crushed garlic, 2T parsley, salt and pepper.
2. Distribute potatoes onto hot cookie sheet and bake undisturbed for at least 15 mins before flipping.  Bake for another 15 minutes or until tender and crispy.
3. Before serving, gently toss with remaining 2 cloves of crushed garlic and 2 T parsley, a drizzle of truffle oil and several pinches of truffle salt. Serve and enjoy.

 photo (8)

Filed Under: Dinner, Seafood, Sides Tagged With: bread, cheese, fish, food, halibut, recipe, sandwich

On the (Herb-crusted) Lamb with Mushroom and Leek Bread Pudding

January 2, 2013 by Eva Louise Leave a Comment

lamb1

Herb-crusted lamb with mushroom and leek bread pudding – fast friends that seemed so natural together after just one encounter. The herb-crusted lamb isn’t anything revolutionary (just luscious) but a savory bread pudding?! Totally revolutionary. Inspired by Ina Garten, I actually followed the recipe (!) and it turned out beautifully.

Herb-crusted rack of lamb

adapted from Fine Cooking Magazine

  • 2 racks of lamb, about 1-1/4 lb. each, chine bones removed, rib bones frenched, and meat trimmed of all but a thin layer of fat
  • Kosher salt and freshly ground black pepper
  • 2 cloves garlic, minced
  • 1/4 cup chopped fresh parsley
  • 2 Tbs. chopped fresh thyme
  • 1 cup soft fresh breadcrumbs
  • 1/4 cup olive oil
  • 2 Tbs. Dijon mustard
 

Position an oven rack in the middle of the oven and heat the oven to 475°F. Season the lamb with salt and pepper. Combine the garlic, parsley, thyme, and breadcrumbs in a shallow bowl. Moisten the mixture with enough olive oil to make the mixture hold together.

Heat a large dry skillet over high heat. Put the lamb, meat side down, in the skillet. With tongs, hold the lamb against the skillet for a minute to give it a nice brown crust. Turn the meat to sear it on all sides for a total of 4 minutes. Remove the meat from the skillet and paint the meaty side of the rack with the mustard. Roll the meat in the herb mixture to coat it. Sear and coat the second rack in the same way.

Transfer the racks to a roasting pan just large enough to hold them. Cover the rib bones with strips of foil so they don’t burn and roast until medium rare, 20 to 25 minutes (120-140°F internal temperature). (I forgot cover the bones and smoked out the whole kitchen). If you want a crispier crust, finish cooking under the broiler for 2 minutes. Let the racks rest for 5 minutes before carving.

Use a carving knife to cut between the rib bones. Arrange the chops on warm serving plates. Serve hot. (The chops will cool quickly, so the best strategy is to carve the racks at the table.)

Ina Garten’s Mushroom and Leek Bread pudding

  • 6 cups (1/2-inch-diced) bread cubes from a rustic country loaf, crusts removed
  • 2 tablespoons good olive oil
  • 1 tablespoons unsalted butter
  • 2 ounces pancetta, small-diced (optional)
  • 4 cups sliced leeks, white and light green parts (4 leeks)
  • 1 1/2 pounds cremini mushrooms, stems trimmed and 1/4-inch-sliced
  • 1 tablespoon chopped fresh tarragon leaves
  • 1/4 cup medium or dry sherry
  • Kosher salt and freshly ground black pepper
  • 1/3 cup minced fresh flat-leaf parsley
  • 4 extra-large eggs
  • 1 1/2 cups heavy cream
  • 1 cup chicken stock, preferably homemade
  • 1 1/2 cups grated Gruyere cheese (6 ounces), divided

Preheat the oven to 350 degrees F. Spread the bread cubes on a sheet pan and bake for 15 to 20 minutes, until lightly browned. Set aside.

Meanwhile, heat the oil and butter in a large (12-inch) saute pan over medium heat. Add the pancetta and cook for 5 minutes, until starting to brown. Stir in the leeks and cook over medium heat for 8 to 10 minutes, until the leeks are tender. Stir in the mushrooms, tarragon, sherry, 1 tablespoon salt and 11/2 teaspoons pepper and cook for 10 to 12 minutes, until most of the liquid evaporates, stirring occasionally. Off the heat, stir in the parsley.

In a large mixing bowl, whisk together the eggs, cream, chicken stock and 1 cup of the Gruyere. Add the bread cubes and mushroom mixture, stirring well to combine. Set aside at room temperature for 30 minutes to allow the bread to absorb the liquid. Stir well and pour into a 2 1/2-to-3-quart gratin dish (13 x 9 x 2 inches). Sprinkle with the remaining 1/2 cup Gruyere and bake for 45 to 50 minutes, until the top is browned and the custard is set. Serve hot.

Filed Under: Dinner, Sides Tagged With: cheese, food, herbs, lamb, meat, mushrooms, recipe, vegetables

  • Page 1
  • Page 2
  • Go to Next Page »

Primary Sidebar

Don't miss a post!

Enter your email to subscribe and receive notifications of new posts by email.

Welcome

I’m Eva Louise and welcome to Mind in the Butter! This is my food bloggy, showcasing my favorite dishes and recipes often inspired by and cooked for my loved ones. My goal with this blog is to eventually document every single dish I make so when I’m old and stale, I will be able to remember and celebrate memories from my favorite place…the kitchen!

Recent Posts: Mind in the Butter

Shulamit’s Unreal Lasagna with Ground Beef and Spinach

Best-ever 4 minute Instant Pot Rice

Best-ever 4 minute Instant Pot Rice

Seared Scallops and Fennel Risotto

Seared Scallops and Fennel Risotto

Palm Springs: the World’s Best Jetlag Cure

Palm Springs: the World’s Best Jetlag Cure

The Karmic Boomerang is real! New Year, new beginning for me

The Karmic Boomerang is real! New Year, new beginning for me

Copyright © 2025 · Foodie Pro & The Genesis Framework