• Skip to primary navigation
  • Skip to main content
  • Skip to primary sidebar

Mind in the Butter

Food for taste, buds, and family

  • Recipes
    • Appetizers & Snacks
    • Breakfast
    • Desserts
    • Dinner
    • Drinks & Cocktails
    • Instant Pot
    • Pasta & Grains
    • Salads & Vegetables
    • Seafood
    • Sides
    • Soups & Stews
  • Entertaining
    • Holidays
  • Life & Travel
  • Food & Sustainability

dinner

So…this happened: Epic Crab Pasta with Vodka Sauce and Garlic Breadcrumbs

February 24, 2014 by Eva Louise Leave a Comment

 DSC_0644DSC_0647

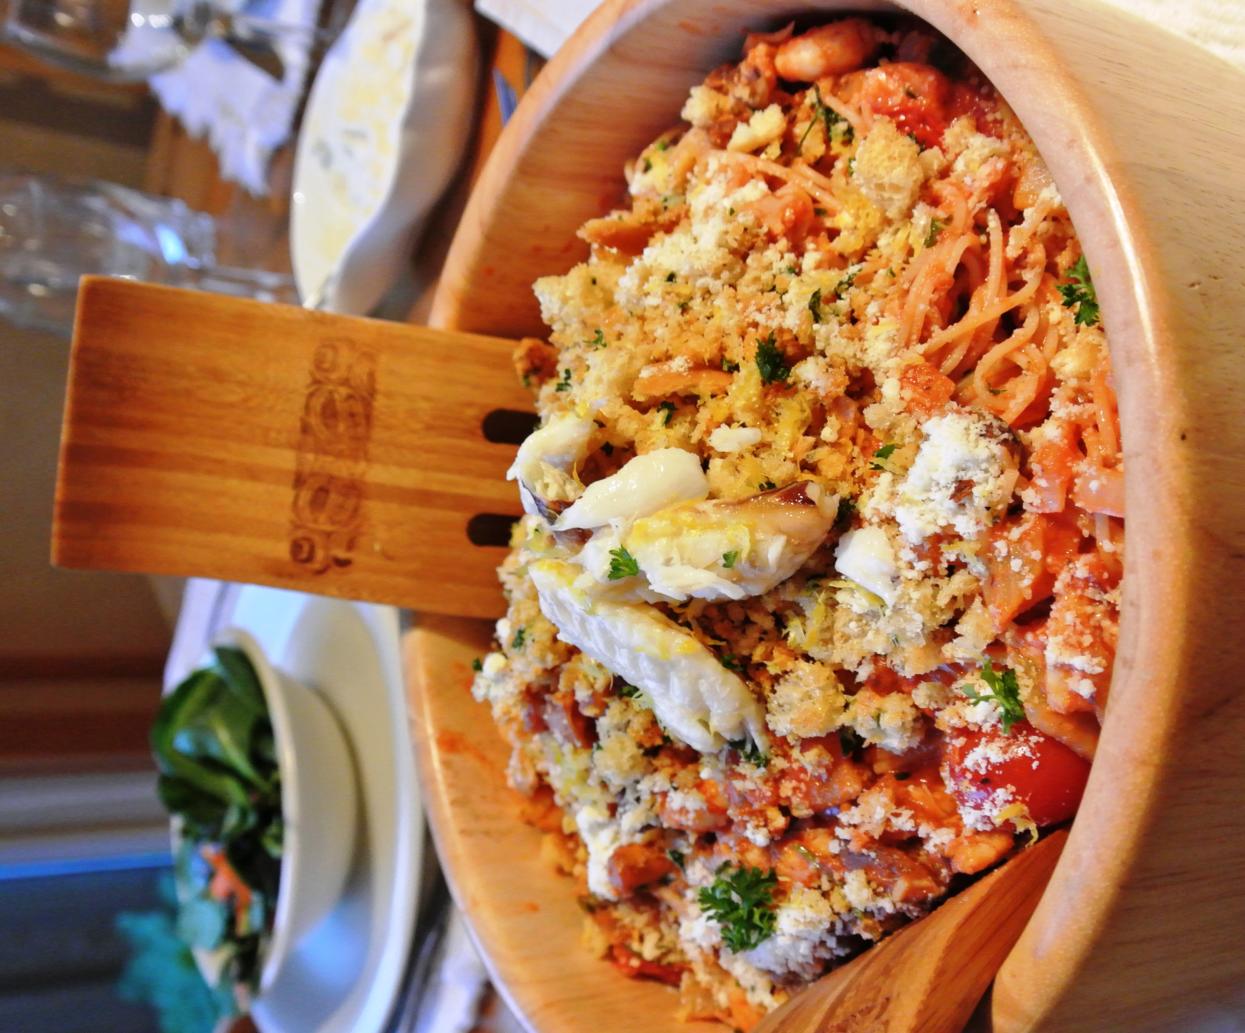
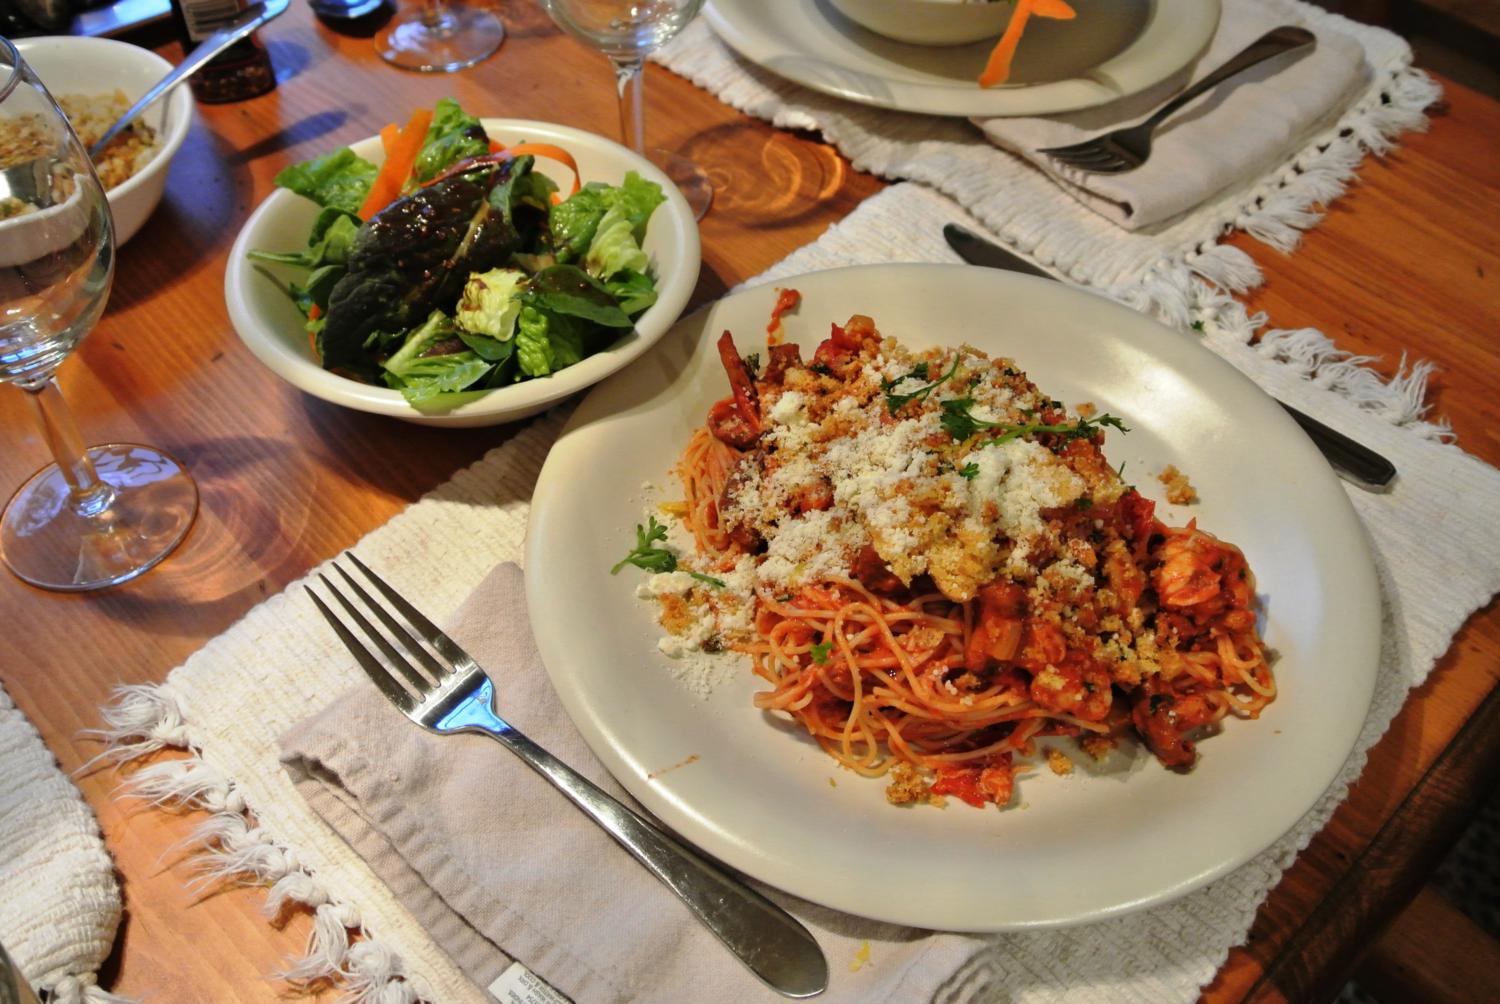
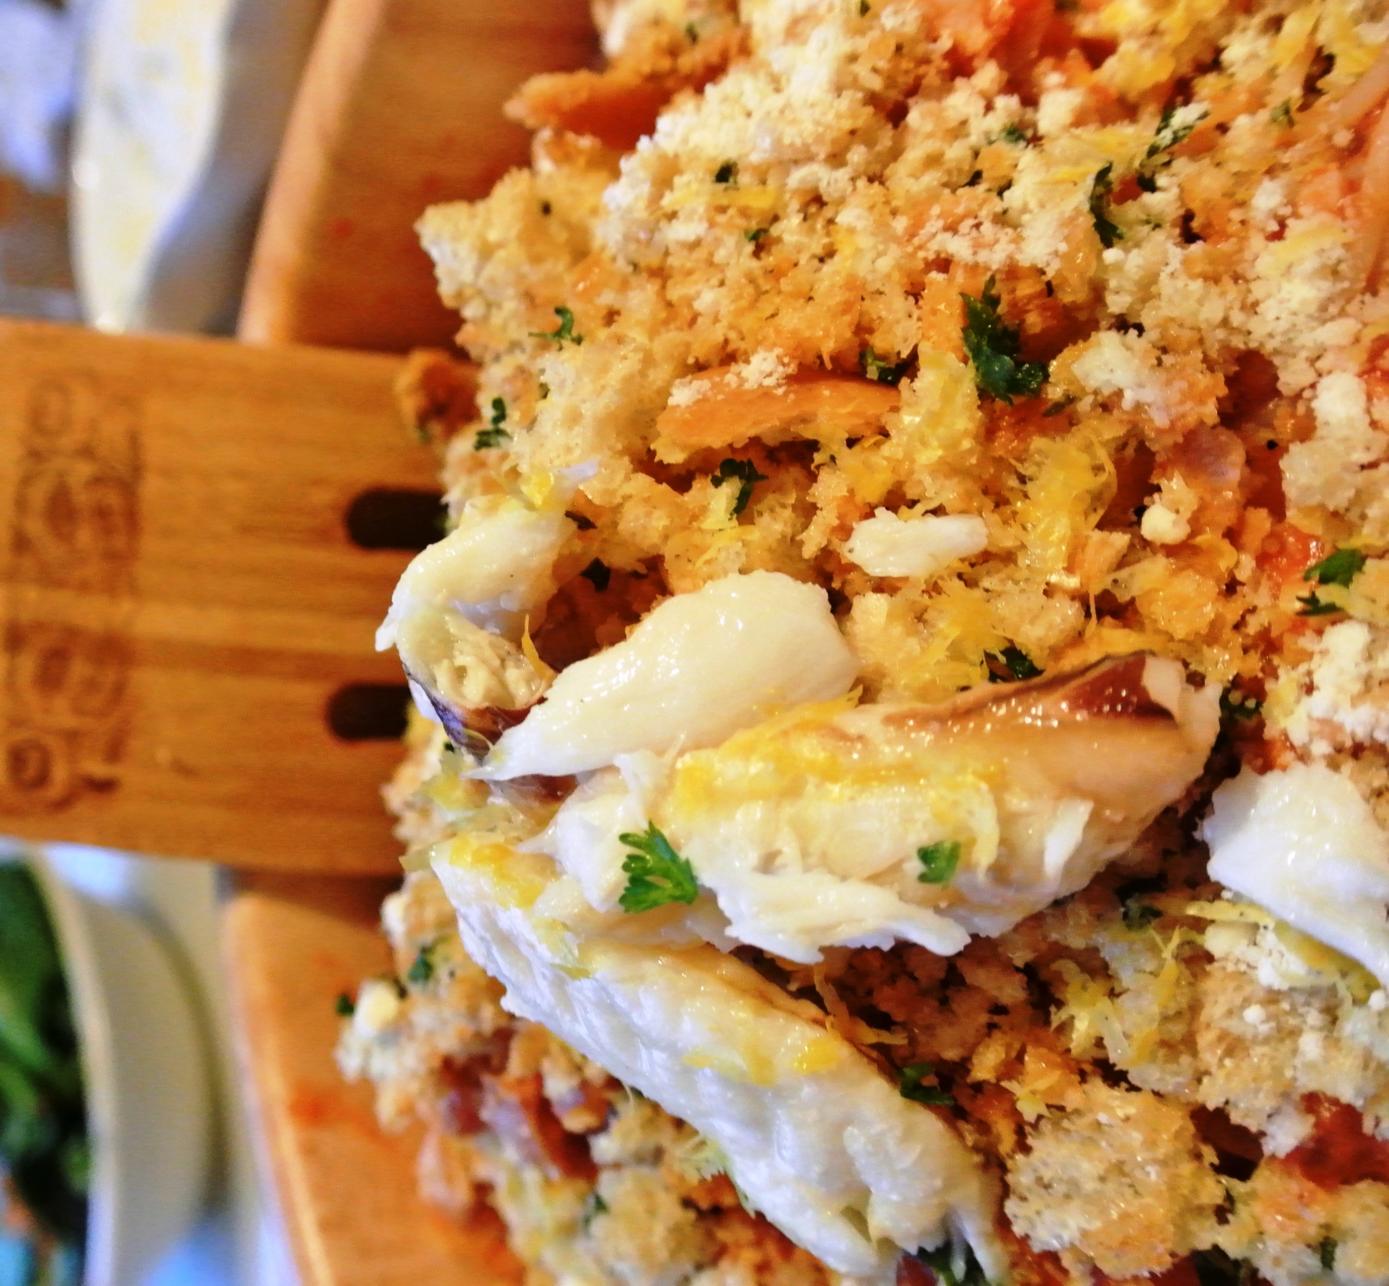
Stingray is coming home from Ethiopia soon and I can tell he’s seriously hankering for some of my homemade cooking.  I thought it would be fun to drive his belly bonkers by posting this epic crab pasta with vodka sauce that I made for the family a while back. It’s a Serious Eats’ recipe for Pasta with Crab, Tomato, and Chilies and it’s a knockout. It’s a simple set of ingredients with a medium level of difficulty (you need to blend the hot tomato sauce which I find to be challenging to do without incident), and one of the few recipes I actually followed entirely. The recipe is made extra delicious with the addition of homemade garlic breadcrumbs; with these I can assure you, there will be no leftovers. I’m sorry to report (not!) that my version was made with fresh dungeness crab that Dad caught earlier in the day. Brings tears to my eyes just thinking about it. Enjoy this beauty.

Pasta with Crab, Tomato, and Chilies

DSC_0646

 Ingredients

  • 2 tablespoons  butter
  • 3 tablespoons extra-virgin olive oil, divided
  • 3 medium cloves garlic, minced (about 1 tablespoon)
  • 1/2 teaspoon red pepper flakes
  • 1 (28-ounce) can whole peeled tomatoes, drained and roughly broken up by hand
  • 1/3 cup heavy cream
  • 1/4 cup vodka
  • Salt and freshly ground black pepper
  • 1 small red hot chili, finely sliced (optional)
  • 2 slices rustic bread, roughly torn
  • 2 tablespoons minced fresh chives
  • 2 tablespoons minced fresh parsley leaves
  • 1 pound fresh spaghetti, fettucini, or tagliatelle (dry pasta can also be used)
  • 1 pound lump or jumbo lump fresh crab meat (get the good stuff)

Instructions

  1. Heat butter and 2 tablespoons olive oil in a medium saucepan over medium heat until melted and foaming subsides. Add garlic and red pepper flakes and cook, stirring constantly, until fragrant but not browned, about 1 minute. Add tomatoes and heavy cream. Bring to a boil, reduce to a simmer, and cook, stirring occasionally, until lightly reduced, about 10 minutes. Add vodka and simmer for 4 minutes longer. Don’t blow up the kitchen!
  2.  Transfer mixture to a blender and blend on high speed until completely smooth. Season to taste with salt and pepper and transfer 2 cups to a large saucepan. Reserve remaining sauce for another use. Don’t burn yourself!
  3.  Bring a large pot of salted water to a boil. Combine bread, a garlic clove and remaining olive oil in a food processor. Process until fine crumbs are formed. Transfer to a medium skillet and cook over medium-high heat, stirring and tossing constantly until golden brown. Transfer to a small bowl. Season bread crumbs to taste with salt and pepper and add a pinch of parsley and chives. Toss to combine. Set aside.
  4.  Add crab and optional sliced chilies to saucepan with sauce and stir to combine. Cook spaghetti in boiling salted water just until it is barely cooked through, about 2 minutes (if using dry pasta, cook according to package directions). Drain pasta, reserving 1 cup of cooking liquid. Transfer pasta to saucepan with sauce stir in remaining herbs. Heat over high heat until sauce is simmering and pasta is completely coated, adding reserved pasta water as necessary to thin sauce to desired consistency. Serve immediately, topping with bread crumbs.


Filed Under: Dinner Tagged With: crab, dinner, pasta, seafood, tofino

All Hail the Sandwich King: The Havarti Dill Salmon Melt

November 15, 2013 by Eva Louise 1 Comment

awesomeness

We’ve discussed this before but let me reiterate – Stingray is the supreme sandwich maker as evidenced by this post. No, but actually… he is.   He’s detail oriented and patient enough to make my sandwich just the way I like it. Don’t even get me started on his egg sandwiches…*eyes cross in ecstasy*

Anyway, I called him from work the other night and asked him to make me a delicious dinner (I do all the cooking, therefore I can demand this on the occasion) and this is what the genius came up with: an open-faced salmon melt with Havarti dill and a lemon aioli.  To make it a meal, we heated up some roasted vegetable soup, and I made a refreshing side salad of watercress with lemon juice and a zesty aioli to drizzle on the sandwich. It was heavenly.

amazing mealmoneyshotdelicious aoiliaioli

Salmon Melt with Havarti Dill and Lemon Aioli

Makes 2 

  •  2 fillets of 4-6 oz. salmon (Pacific salmon if you can get it)
  • 1 t Paprika
  • ½ t Cayenne
  • 1 t Italian seasoning
  • 1 t Herbs de Provence or some other hearty spice mix
  • Juice of ½ lemon
  • 2 T olive oil
  • S/P
  • 2 slices of fresh chewy bread
  • ¼ cup grated Havarti, or 2 slices from the deli
  • 2 T finely chopped dill

Preheat oven to 375

In a bowl mix paprika, cayenne, Italian seasoning, Herbs de Provence, lemon juice and olive oil until it’s a loose paste.  Add a pinch of salt and pepper.  Taste and adjust flavoring; the mixture should be very salty and intense.

Rinse the salmon, pat dry and season with a generous pinch of salt and pepper.  If the skin is still on, leave it; the meat will lift away easily from the skin after it bakes.

Drizzle the bottom of a stone or glass dish (oven-proof obviously) with olive oil and place the salmon in the center of the dish, flesh side up.  Pour the herby paste mixture over  the salmon. Tuck the de-juiced lemon half next to the salmon for extra flavor and cover with aluminum foil and bake.  Depending on the thickness of the salmon, it should take about 15-20 minutes. A single, thinner fillet may only take  about 10-12 minutes. Hint: White tear drops will start to form on and around the salmon when it’s ready. Don’t be afraid to under cook the fillets slightly because next up is the broiler once the sandwich is assembled.

After they’re baked, keep the salmon fillets warm under the foil on a plate. Chuck the roasted lemon.

Lightly butter the 2 slices of chewy country bread.  Heat a pan to medium-high and toss on the buttered slices. Heat until golden brown.

On a cookie sheet, assemble the sandwiches by placing the slices of bread in the center of the cookie sheet, then a fillet of salmon on each slice. If the salmon is too thick, or looks awkward and block-ish, fan it out across the bread. The fillet will break apart naturally. Mix the fresh chopped dill with grated Havarti and sprinkle generously over the salmon.

Broil the open face sandwiches for about 3 minutes.  Check on them constantly so they don’t burn! They’re ready when the cheese is golden and bubbly and the oven hasn’t caught fire. #winning

Serve with a lemon aioli (recipe below),  a piping hot soup and a cool, crisp salad and you’re ready to go!

Lemon Aioli 

  • juice of 1/2 lemon
  • 2 T mayonnaise
  • 1 T finely chopped dill
  • cracked pepper

No magic here, mix all ingredients together until smooth and yummy. Adjust flavors as needed, serve with your delicious sandwich.


Filed Under: Dinner Tagged With: cheese, dinner, lunch, Main, salmon, sandwich, sauce, seafood

Rosemary Skewered Halibut

April 21, 2013 by Eva Louise 2 Comments

blog hLIBUT SKEWERSRecently, my mom gave me about a dozen rosemary branches from her garden. It was a lot of herb and I didn’t want it to go to waste, so I made this Rosemary Skewered Halibut. Rosemary is an intensely woody and lemony herb that I normally associate with meats, but Halibut is a pretty bland and trim fish, so the intensity of the rosemary actually worked quite nicely.  The halibut can easily be substituted for chicken, red meat, lamb or tuna, and since it’s almost summer, these skewers would be happiest when cooked on the grill.

The secret to this dish is marinating the halibut for at least 1 hour beforehand in a really intense herb blend. I tossed some fresh thyme, seasoned salt, paprika, garlic, Italian seasoning, herbs de provence, an herb mix containing dried chervil, parsley and coriander (pretty much the entire spice rack) and olive oil in a medium sized glass bowl and let it hang on the counter for about 10 minutes. If you try this recipe, the marinade should be almost pasty and super intense in flavor.

While the marinade rested, I rinsed and pat dry a beautiful filet of halibut and cubed it into 1 inch chunks, added it to the marinade bowl and chilled it for 1 hour.

I then heated the oven to 475 and lined a cookie sheet with tin foil and olive oil. With an entire stalk of rosemary, I laced 3-4 cubes of halibut down the rosemary from the bottom up and laid them on the cookie sheet so no halibut cubes were touching, then baked them for about 8-10 minutes until they were golden brown (they go fast, so keep on eye on them so they don’t  over cook).  Note: the rosemary edges will burn at this high heat.  This  is fine, but just have someone ready to do the “dish towel helicopter” under the smoke detector just in case.

I served the skewers with a kale salad and mushroom polenta and I can’t wait to get my hands on more fresh rosemary so I can do this again….

Filed Under: Dinner, Seafood Tagged With: cooking, dinner, food, halibut, herbs, recipe, seafood

Halibut Top Ramen

February 27, 2013 by Eva Louise Leave a Comment

photo (11)Last week I did a post featuring a fried halibut sandwich with one of two halibut fillets we had. The fate of the second fillet is featured above– an Asian-style halibut soup with tender ramen noodles, shiitake mushrooms, leeks, baby bok choy…and about 100 herbs and spices. I really got into it and made the soup using my wok and a wooden sushi spoon as a ladle. (I’ll admit, I was even  a whisker away from wearing a Hello Kitty apron…)

Like many of my recipes, the ingredients are interchangeable but the trick here is  to layer them properly to get the right depth of flavor and the right consistency (ie not mushy, not too salty or bland). So below I’ve outlined, not a recipe, but conceptual steps to take to make a tasty Asian-style soup.

aromatics/sturdy vegetables and proteins + seasonings and oils + broth +  noodles +  delicate vegetables and fish + serve+ garnish = so awesome.

Step 1: Saute mushrooms and aromatics (onions, garlic, shallots etc.). If you’re using beef, tofu, shrimp or chicken as your protein, cook them here to get maximum flavor and color. They are sturdy enough to withstand the boiling broth.

Step 2: Season liberally with all your “Asian-style” pantry goods: soy sauce, dash of rice wine vinegar, green onion, ginger, mirin, seasame oil, lemongrass.

Step 3: Add broth: I mix 1 carton of chicken broth and 1 carton of vegetable broth. Combinations of beef, mushroom or fish stock would be equally as delicious.

Step 4: In separate pot, boil noodles only until tender. Drain and set aside. Ramen – the jerry curl of noodles – is my noodle of choice since they are easier to grip with chopsticks.

Step 5: while the noodles cook, add delicate vegetables: bok choi, spinach, leeks, zucchini and fish: haddock, cod, salmon, halibut etc. and stir gently for about 2 minutes.

Step 6: Add a generous scoop of ramen noodles into the bottom of a pretty bowl then ladle soup making sure to get all the good bits; the vegetables and protein.

Step 7: Garnish with sesame seeds, green onion, hot chili oil, whatever your heart desires.

Filed Under: Dinner, Seafood, Soups & Stews Tagged With: Asian, dinner, food, recipe, seafood, soup, vegetables

Superwoman’s Salmon, Fennel and Mushroom Pot Pie

November 26, 2012 by Eva Louise Leave a Comment


Coho Salmon, Fennel, and Mushroom Pot Pie with Truffle Cream

Ray and I woke up early, had a delicious breakfast and headed to the Metropolitan Museum to see the Warhol and Protoshop exhibits, amongst a thousand other amazing works of art.  After three lovely hours of photographs, paintings, vases and tombs, I managed to do three loads of laundry at the laundromat (with Ray’s help), mend our ripped duvet, go to the grocery store, workout for an hour and then bake what I’ve been craving for weeks–a salmon pot pie, just in time for half time of the Giants game. Flaky and rich, this pot pie blew the traditional chicken-carrot-pea-celery combo straight out of the water. I call it “Superwoman’s pot pie” because I’m having one of those Sunday evenings where I can’t stop high-fiving myself because I was so awesome and productive all day.

High-fives aside, I juiced this dish up by tucking a teaspoon of truffle butter under the hood of puff pastry before serving.  Since I’m amazing at following recipes (not), I used the Food Network’s  here.

I tried to be cute and put pastry fish on the top, but after being in the 400 degree oven it looks like two of them got a little fresh…

Filed Under: Dinner, Seafood Tagged With: dinner, fish, food, salmon, seafood, truffle, vegetables

Button Soup

November 21, 2012 by Eva Louise 1 Comment

Piping hot matzoh ball soup, fresh challah with salted Irish butter…Mom would be pleased!

Last weekend my sister came over; we pulled out my big stock pot and spent the whole day (punctuated by cookies breaks and catnaps) leisurely making our mom’s good ol’ Jewish Matzoh Ball Soup.  We jokingly call it “button soup” after a short story we used to read: An old woman traveling takes shelter at a poor and grumpy old man’s house. She ends up making the old ungrateful bastard man a scrumptious soup with a button as it’s first and most important ingredient.  Like button soup, matzoh ball soup is a peasant soup, simple and modest in it’s composition, making nothing more comforting. It’s a great time to share this recipe especially with the turkey surplus we’re all about to experience.

Mom’s recipe ( adapted from her Grandma and Aunt):

Matzoh Ball Soup

I learned how to make this soup as I have many dishes from my Grandma Ida and my Aunt Josie.  Having said this, these recipes are never exact, never measured rather “eye-balled” and approximated.  So, this is my way of saying, I too add a little of this and a bit more of that ….and so will you.  The most important ingredient is that you make it with love!  Here is the best I can do without showing you.

For a Large Pot of Soup:

  • A whole kosher chicken, rinsed off and patted dry, or alternately pieces of chicken with bones 6 to 9 leg/ thigh combos (boneless breasts would be too dry and stringy)
  • ** Two different ways:   I put in 8 cups of Swanson chicken broth and 8 cups of College Inn Chicken Broth into the pot bring to a simmer, add the whole chicken breast side down.  Add enough water or more broth, if necessary, to cover chicken and come up to fill ¾ full of your soup pot. ** (Of course Grandma Ida just used water, especially with the kosher chicken as it is already salted, hence the reason I am having you rinse and pat it) but you would then need to add chicken bouillon, probably 2 tablespoons or to taste.  I like my way better, I must admit.
  •  Add to pot with the chicken in it:

-2-3 rough chopped medium sized yellow onions
-2    sliced and peeled parsnips
-3-4 stalks peeled and cut up celery
-4-5 peeled and sliced carrots
-3-4 crushed garlic or a couple more if you have a cold

  • Don’t add yet, Set aside:   4-5 Tablespoons of very well washed parsley (no sand, uh!) well chopped, to add in the last 15 minutes.  Pretty much for color.
  • Cover and simmer for probably 2 to 2 ½ hours.  Check on it, stir every once in a while and test along the way.  Skim off any creepy stuff that may or may not float to the top and discard….of course.
  • At the end you can remove the chicken, cool it, disassemble, cut it up and add back into soup.
  • Serve with either wide egg noodles already prepared separately or Matzo balls…Yum!!

Filed Under: Dinner, Soups & Stews Tagged With: chicken, dinner, family, food, Jewish, matzoh ball soup, matzoh balls, mom, soup, vegetables, vegetarian

Buenos Aires Cannellonis: Jamon y Queso + Verdura

August 9, 2012 by Eva Louise Leave a Comment

Baked Cannelloni

My Buenos Aires Cannellonis are inspired by my time living in the “Paris of Latin America.”   Each morning I would pass Mas Pastas,  fogging up the  glass window as three old men buzzed around the checker-floored pasta shop. One man would delicately drop dollops of ricotta onto rugs of ravioli pasta, another kneaded pizza dough and the other formed pillows of potato dough for fresh gnocchi. When I finally mustered up enough courage and enough Spanish, I  became a regular at Mas Pastas, frequently stopping in for a  dozen cannellonis (cheese-filled tubes of fresh pasta) to cook for friends and my host family.

While no cannellonis can really do Mas Pastas justice, here is my take on the most popular variations: cannellonis con jamon y queso (ham and cheese) and cannellonis con verduras (vegetables) topped with tomato sauce.  On my next try, I might go for crab filled cannelloni with a bechamel sauce (yow!).

For this recipe, I use my secret weapon-wonton papers!  You can find them in the produce section next to the vegan chorizo (why, why does that exist?) and the tofu shaped like chicken nuggets.  Wonton papers are extremely versatile and really fun to work with.  In addition to using them for cannellonis, I use them to make homemade raviolis; I even used them to make a quick lasagna once.

Filling: I make a very simple base filling of ricotta, cream cheese, mozzarella, 1 medium sauteed onion, seasoned with fresh garlic, salt and pepper. I then split the filling between two bowls and add vegetables to one and meat to the other:

For Jamon y Queso: I sautee cubes of pancetta (sturdy and salty, ideal for this dish) in a pan to make them nice and crispy before adding them to the filling.  Cooked bacon, prosciutto, chicken or shrimp would be great alternatives.

For Verduras y Queso: I sautee frozen spinach (drain before adding to pan) with a zucchini cut into thin half-moons and seasoned  with chili flakes. Mushrooms are a slammin’ addition.

Once the variations are added to each bowl of filling, I prepare a clean, flat surface and small dish of water (to seal the seam of the wonton paper) and then make the cannellonis:

Step 1: Scoop 2 heaping tablespoons of filling along one side of the wonton paper, careful not to let any get too close to the edge.

Step 2: Pull the wonton over the filling.  Pressing your fingers flat on the cutting board, tug the wonton paper back (think how the guys at Chipotle wrap burritos).  This will ensure that filling is tightly packed into the wonton paper.

Step 3: Once the filling is snug,  roll the wonton paper once and wet the top edge with water.

Step 4: Finish rolling the wonton paper by sealing the wet edge to rest of the cannelloni.

Step 5: Line the bottom of a large glass dish with pasta sauce, place the cannelloni seam-side down.

Step 6: Cover with the remaining pasta sauce and mozzarella cheese, bake at 350 for 30-40 minutes, until the top is bubbling.

Filed Under: Dinner Tagged With: Argentina, dinner, meat, pasta, vegetables

Primary Sidebar

Don't miss a post!

Enter your email to subscribe and receive notifications of new posts by email.

Welcome

I’m Eva Louise and welcome to Mind in the Butter! This is my food bloggy, showcasing my favorite dishes and recipes often inspired by and cooked for my loved ones. My goal with this blog is to eventually document every single dish I make so when I’m old and stale, I will be able to remember and celebrate memories from my favorite place…the kitchen!

Recent Posts: Mind in the Butter

Shulamit’s Unreal Lasagna with Ground Beef and Spinach

Best-ever 4 minute Instant Pot Rice

Best-ever 4 minute Instant Pot Rice

Seared Scallops and Fennel Risotto

Seared Scallops and Fennel Risotto

Palm Springs: the World’s Best Jetlag Cure

Palm Springs: the World’s Best Jetlag Cure

The Karmic Boomerang is real! New Year, new beginning for me

The Karmic Boomerang is real! New Year, new beginning for me

Copyright © 2025 · Foodie Pro & The Genesis Framework