• Skip to primary navigation
  • Skip to main content
  • Skip to primary sidebar

Mind in the Butter

Food for taste, buds, and family

  • Recipes
    • Appetizers & Snacks
    • Breakfast
    • Desserts
    • Dinner
    • Drinks & Cocktails
    • Instant Pot
    • Pasta & Grains
    • Salads & Vegetables
    • Seafood
    • Sides
    • Soups & Stews
  • Entertaining
    • Holidays
  • Life & Travel
  • Food & Sustainability

His and Hers Ethiopian Hot Sauce

March 16, 2014 by Eva Louise 1 Comment

berbere hot saucehisandhershotsauce
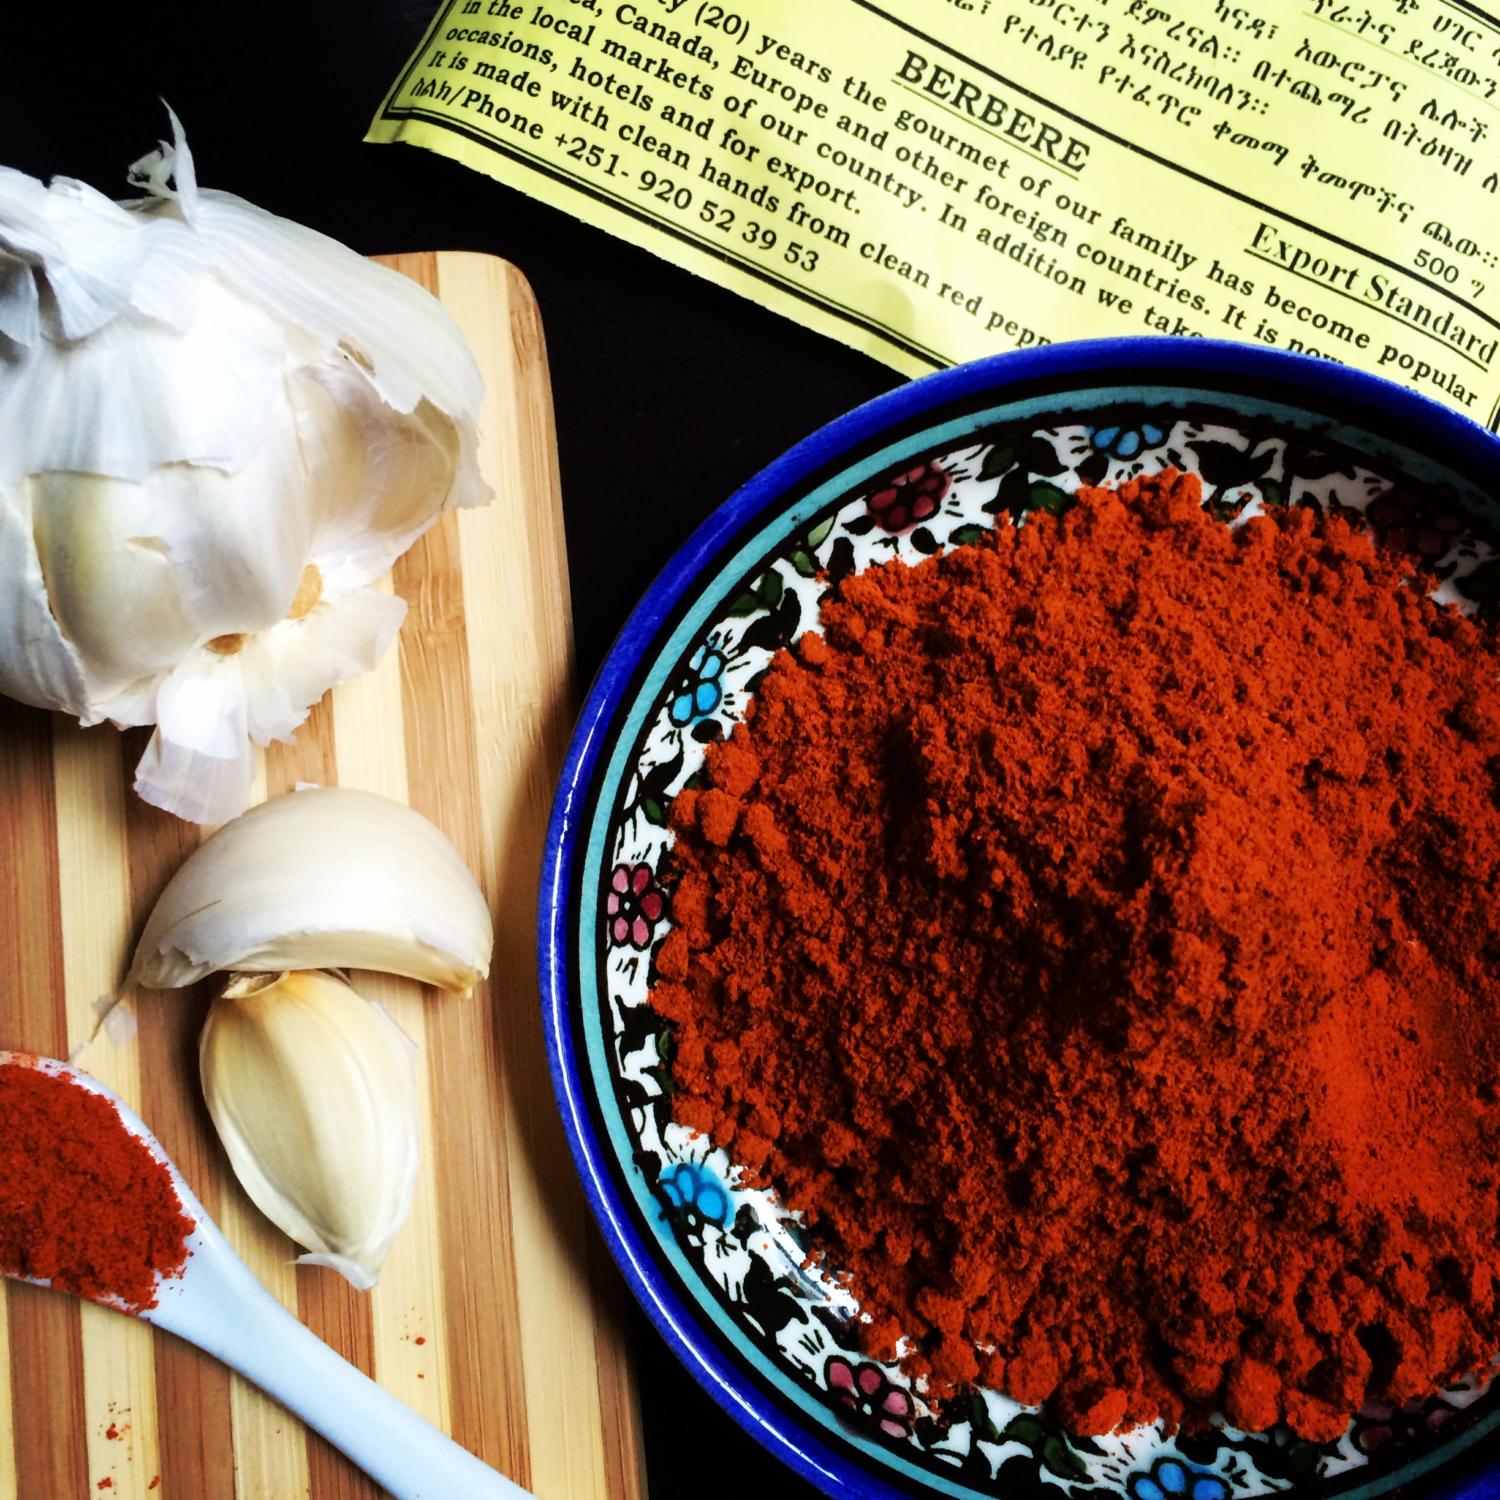
Stingray brought me home about a pound of berbere spice from his recent trip to Ethiopia. Berbere is a generic term for Ethiopian spice mixtures made from red chilies, garlic powder, onion power and other spices all ground up and used in delicious Ethiopian cuisine.  I appreciated the gesture, and I do like chilies, but um…what are you supposed to do with an entire POUND of them?! The only thing I could think of was to make hot sauce. So we did, and it was awesome.

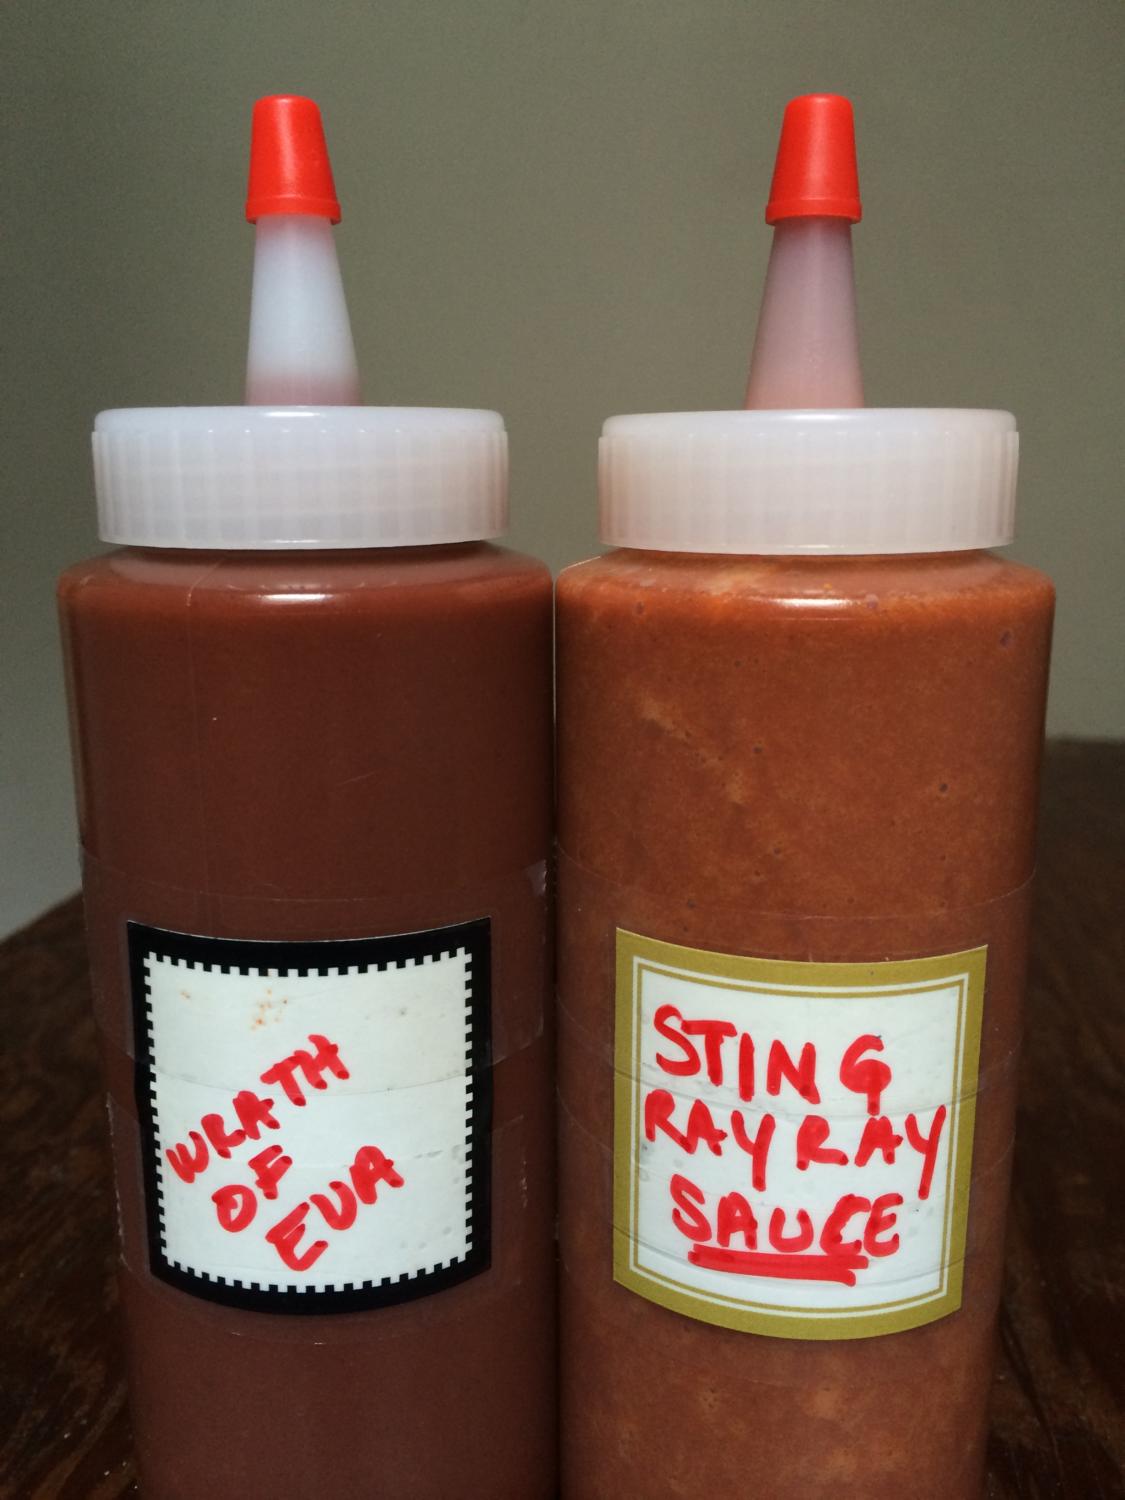
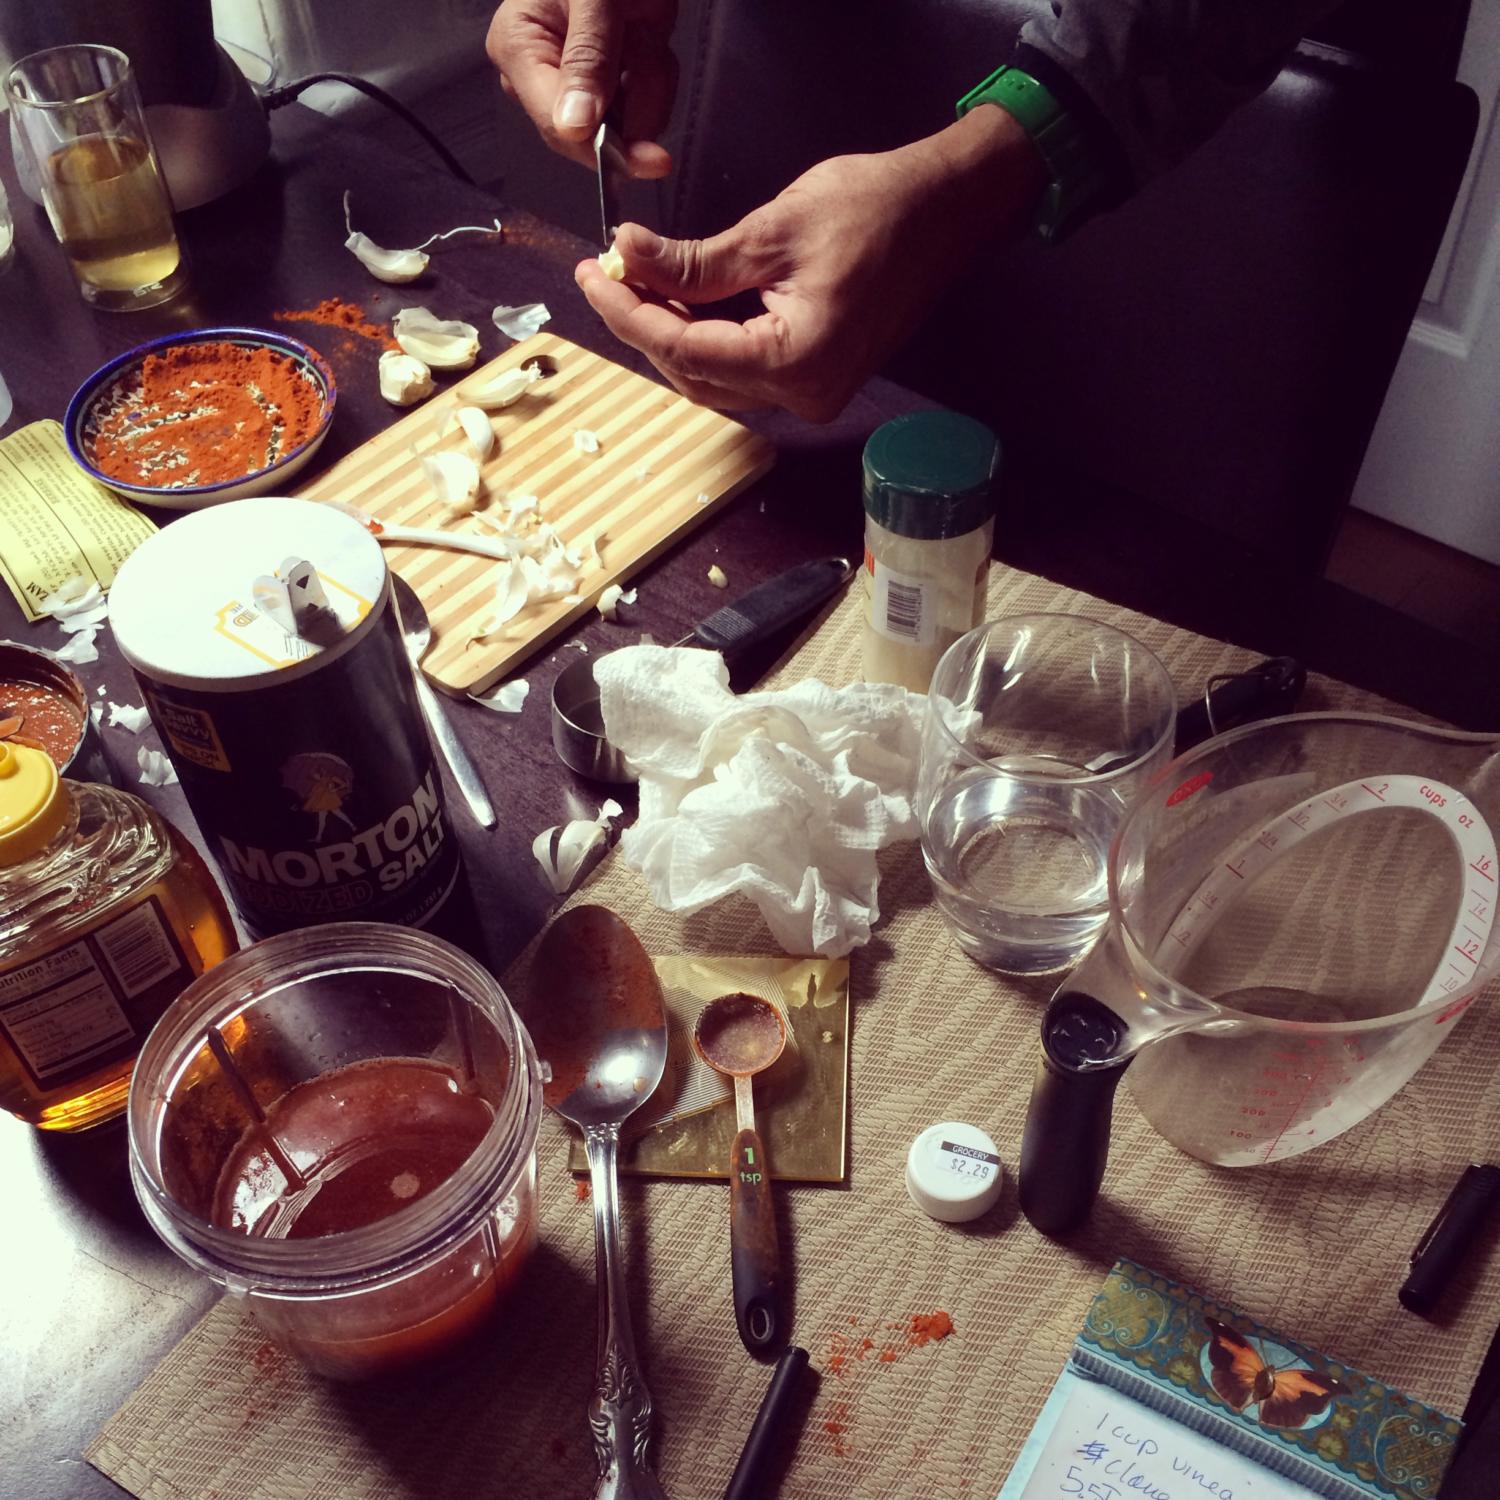
It was fun and relatively easy to make in terms of process, but definitely took major trial and error in getting the flavors right. We made two different types: “Eva’s Wrath” – tangy, smokey with medium heat reflecting my desire for complex flavors, and “Sting RayRay Sauce” – garlicky with intense heat reflecting Stingray’s purist preferences. It was a perfect Sunday afternoon activity; we are so damn pleased with ourselves. Thanks for the strange and cumbersome souvenir, babe!
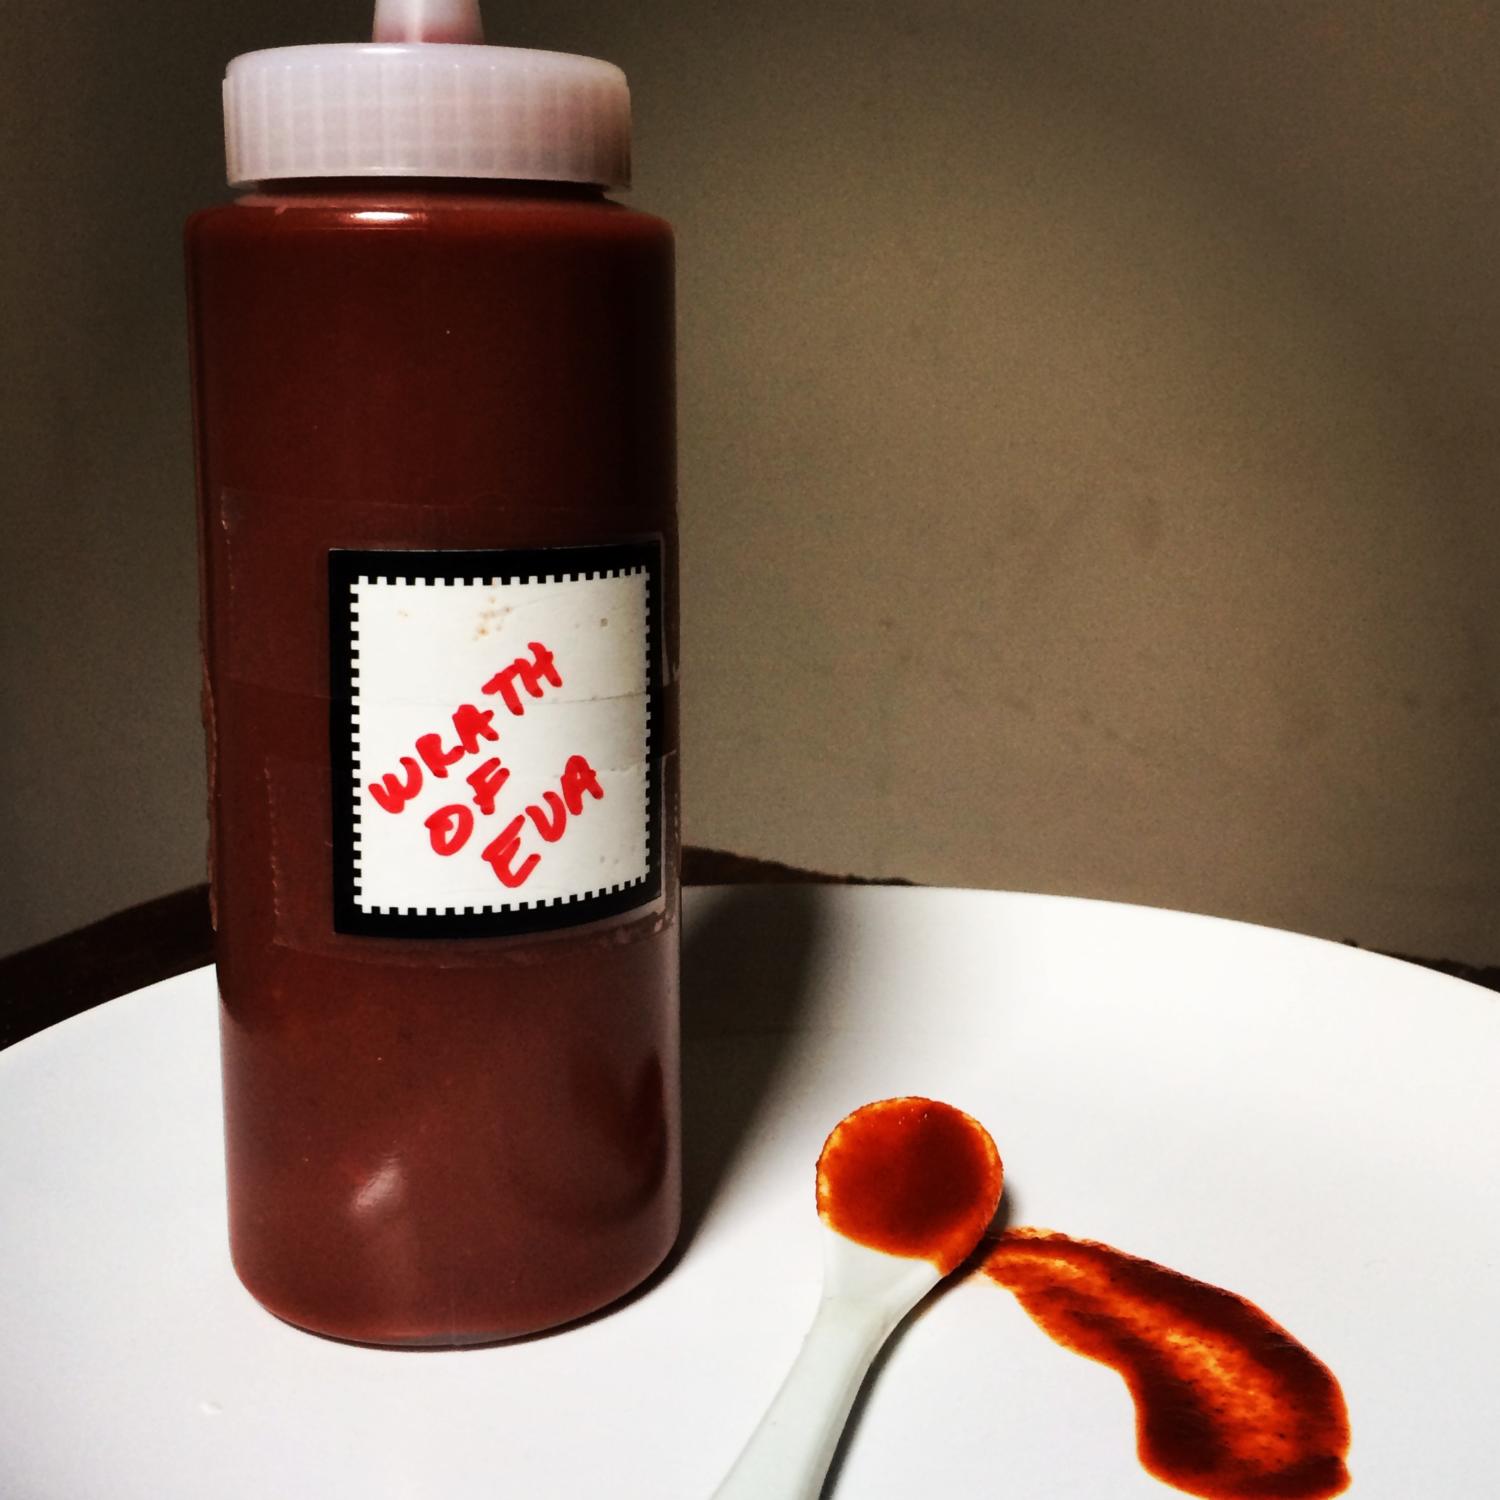
hot sauce labratory

wrath of eva hot sauce_closeup


Eva’s Wrath

smokey, tangy, medium hot

  • 3/4 cup vinegar
  • 6 cloves garlic, crushed
  • 6 tsp berbere chili spice
  • 3 tsp honey or sugar
  • 3 tsp salt (the berbere had salt in it already)
  • 1/2 cup water
  • 3 adobo-soaked chipotle chilies

In a blender or Magic Bullet, blend all ingredients together until super smooth. Transfer to small pan and let simmer on low for 10-15 minutes, stirring gently. This helps cook off some of the tang of the vinegar and brings the flavors together. Bottle. Label. Put on everything.

Sting RayRay’s Hot Sauce

less tangy, more garlicky, hot

  • 1/4 cup vinegar
  • 7 cloves garlic, crushed
  • 6 tsp berbere chili spice
  • 3 tsp honey or sugar
  • 3 tsp salt (the berbere had salt in it already)
  • 1 cup water
  • 1/2 tsp smoked paprika

In a blender or Magic Bullet, blend all ingredients together until super smooth. Bottle. Label. Put on everything.


Filed Under: Life & Travel

So…this happened: Epic Crab Pasta with Vodka Sauce and Garlic Breadcrumbs

February 24, 2014 by Eva Louise Leave a Comment

 DSC_0644DSC_0647

Stingray is coming home from Ethiopia soon and I can tell he’s seriously hankering for some of my homemade cooking.  I thought it would be fun to drive his belly bonkers by posting this epic crab pasta with vodka sauce that I made for the family a while back. It’s a Serious Eats’ recipe for Pasta with Crab, Tomato, and Chilies and it’s a knockout. It’s a simple set of ingredients with a medium level of difficulty (you need to blend the hot tomato sauce which I find to be challenging to do without incident), and one of the few recipes I actually followed entirely. The recipe is made extra delicious with the addition of homemade garlic breadcrumbs; with these I can assure you, there will be no leftovers. I’m sorry to report (not!) that my version was made with fresh dungeness crab that Dad caught earlier in the day. Brings tears to my eyes just thinking about it. Enjoy this beauty.

Pasta with Crab, Tomato, and Chilies

DSC_0646

 Ingredients

  • 2 tablespoons  butter
  • 3 tablespoons extra-virgin olive oil, divided
  • 3 medium cloves garlic, minced (about 1 tablespoon)
  • 1/2 teaspoon red pepper flakes
  • 1 (28-ounce) can whole peeled tomatoes, drained and roughly broken up by hand
  • 1/3 cup heavy cream
  • 1/4 cup vodka
  • Salt and freshly ground black pepper
  • 1 small red hot chili, finely sliced (optional)
  • 2 slices rustic bread, roughly torn
  • 2 tablespoons minced fresh chives
  • 2 tablespoons minced fresh parsley leaves
  • 1 pound fresh spaghetti, fettucini, or tagliatelle (dry pasta can also be used)
  • 1 pound lump or jumbo lump fresh crab meat (get the good stuff)

Instructions

  1. Heat butter and 2 tablespoons olive oil in a medium saucepan over medium heat until melted and foaming subsides. Add garlic and red pepper flakes and cook, stirring constantly, until fragrant but not browned, about 1 minute. Add tomatoes and heavy cream. Bring to a boil, reduce to a simmer, and cook, stirring occasionally, until lightly reduced, about 10 minutes. Add vodka and simmer for 4 minutes longer. Don’t blow up the kitchen!
  2.  Transfer mixture to a blender and blend on high speed until completely smooth. Season to taste with salt and pepper and transfer 2 cups to a large saucepan. Reserve remaining sauce for another use. Don’t burn yourself!
  3.  Bring a large pot of salted water to a boil. Combine bread, a garlic clove and remaining olive oil in a food processor. Process until fine crumbs are formed. Transfer to a medium skillet and cook over medium-high heat, stirring and tossing constantly until golden brown. Transfer to a small bowl. Season bread crumbs to taste with salt and pepper and add a pinch of parsley and chives. Toss to combine. Set aside.
  4.  Add crab and optional sliced chilies to saucepan with sauce and stir to combine. Cook spaghetti in boiling salted water just until it is barely cooked through, about 2 minutes (if using dry pasta, cook according to package directions). Drain pasta, reserving 1 cup of cooking liquid. Transfer pasta to saucepan with sauce stir in remaining herbs. Heat over high heat until sauce is simmering and pasta is completely coated, adding reserved pasta water as necessary to thin sauce to desired consistency. Serve immediately, topping with bread crumbs.


Filed Under: Dinner Tagged With: crab, dinner, pasta, seafood, tofino

Holiday Edition: Spiced Wine-Poached Pears with Mascarpone

December 25, 2013 by Eva Louise Leave a Comment

pears2pears3

I’ve been waiting to make these spiced wine-poached pears, literally for months since I first had them on an amazing trip to South Africa. I decided Christmas Eve dinner was the perfect opportunity to serve them.  On top of being simple, elegant and extremely fragrant, I love the idea of serving poached pears to offset all the chocolate and cookie-eating my family does this time of year.  It’s nice to have something on the lighter side.  I also love these because whatever doesn’t get finished during dessert can be used to pour over pancakes or waffles the next morning.

I used Food 52’s  Red Wine Poached Pears recipe. It was a great recipe but too sweet for my taste, so I’ve adjusted it slightly. I also added cloves which really upped the spice factor. And though  I didn’t think of it until after, I could have added some knobs of fresh ginger left over from my holiday cocktail which would have been lovely.

pears 1pears4

Serves 6

  • 4 cups red wine ( inexpensive, medium-dry wine)
  • 3/4 cup sugar
  • 2 cups water
  • 1 cup orange juice
  • Peels from 2 oranges
  • 1 whole orange (without peel)
  • 10 -12 whole cloves
  • 2 cinnamon sticks
  • A small handful of thyme
  • 6 firm but ripe pears, peeled, stems left intact
  1. After removing the skin from 1 orange, pierce the orange with the cloves, making sure they are well fastened.
  2. Combine everything except for the pears in a large, heavy saucepan. Stir over medium heat until the sugar dissolves and the mixture begins to simmer. Add pears, and bring everything back up to a simmer.
  3. Reduce heat to medium-low and simmer slowly until pears are tender when pierced with knife, about 25 minutes. (But start checking at 20 minutes! Depending on the ripeness of your pears, this could take slightly less or more time.)
  4. Transfer pears to a plate or platter. Boil liquid in saucepan until reduced to 3 cups, about 20 minutes. (Can be made 1 day ahead — just cover and chill pears in the poaching liquid.) Before serving, rewarm over medium-low heat until pears are heated through, or simply serve them at room temperature.
  5. Serve with vanilla ice cream or mascarpone cheese.

Filed Under: Desserts, Entertaining Tagged With: dessert, easy, fruit, holidays, winter

Holiday Edition: Evie’s Festive Punch

December 25, 2013 by Eva Louise Leave a Comment

cocktailtime

I would be lying if I said I didn’t obsess trying to find THE perfect cocktail for this Christmas season. After many hours of googling and deep, personal reflection (at the liquor store), I landed on a Pear and Ginger Rum Punch, laced with a nutty spank of amaretto.

The drink is strong (hello, it has dark rum in it…), it’s nutty from the amaretto, sweet from the pear juice and spicy from the fresh grated ginger. I test-drove the recipe among friends at a cocktail party the other night and it went over well.  I added a seltzer water floater to ensure it didn’t taste too sweet, and added a cranberry and crystallized ginger skewer as garnish (too cute, I know!)

cocktailtime2

Here’s the approximate recipe for this lil’ festive drank.

Makes 1 crazy strong cocktail:

  • 1.5 oz dark rum (Meyers, Mount gay)
  • 3/4 oz amaretto (go for Luxardo, not Disaronno. It’s cheaper and made with 100% almond)
  • 2 oz pear juice (Ceres brand preferred)
  • 1 tsp finely grated fresh ginger (peel away skin and use a micro plane/ fine zester.)
  • Ice
  • Soda/seltzer water
  • Garnish: crystallized ginger and dried cranberry on a toothpick
1. Fill low ball glass with ice
2. Grate fresh ginger directly into glass
3. Pour in rum, amaretto and pear juice
4. Add a splash of soda water on top
5. Stir well and serve!
If you’re going to do a large batch of pre-made punch (recommended) , just make sure  to do 1 part rum, 1.5 parts pear juice and slightly less than 1/2 part amaretto. Grate in a generous amount of ginger and adjust flavors accordingly. For extra credit you can freeze the pear juice in ice cub trays beforehand, then add to the punch bowl so it stays cold.

Filed Under: Drinks & Cocktails, Entertaining Tagged With: cocktails, entertaining, holidays

All Hail the Sandwich King: The Havarti Dill Salmon Melt

November 15, 2013 by Eva Louise 1 Comment

awesomeness

We’ve discussed this before but let me reiterate – Stingray is the supreme sandwich maker as evidenced by this post. No, but actually… he is.   He’s detail oriented and patient enough to make my sandwich just the way I like it. Don’t even get me started on his egg sandwiches…*eyes cross in ecstasy*

Anyway, I called him from work the other night and asked him to make me a delicious dinner (I do all the cooking, therefore I can demand this on the occasion) and this is what the genius came up with: an open-faced salmon melt with Havarti dill and a lemon aioli.  To make it a meal, we heated up some roasted vegetable soup, and I made a refreshing side salad of watercress with lemon juice and a zesty aioli to drizzle on the sandwich. It was heavenly.

amazing mealmoneyshotdelicious aoiliaioli

Salmon Melt with Havarti Dill and Lemon Aioli

Makes 2 

  •  2 fillets of 4-6 oz. salmon (Pacific salmon if you can get it)
  • 1 t Paprika
  • ½ t Cayenne
  • 1 t Italian seasoning
  • 1 t Herbs de Provence or some other hearty spice mix
  • Juice of ½ lemon
  • 2 T olive oil
  • S/P
  • 2 slices of fresh chewy bread
  • ¼ cup grated Havarti, or 2 slices from the deli
  • 2 T finely chopped dill

Preheat oven to 375

In a bowl mix paprika, cayenne, Italian seasoning, Herbs de Provence, lemon juice and olive oil until it’s a loose paste.  Add a pinch of salt and pepper.  Taste and adjust flavoring; the mixture should be very salty and intense.

Rinse the salmon, pat dry and season with a generous pinch of salt and pepper.  If the skin is still on, leave it; the meat will lift away easily from the skin after it bakes.

Drizzle the bottom of a stone or glass dish (oven-proof obviously) with olive oil and place the salmon in the center of the dish, flesh side up.  Pour the herby paste mixture over  the salmon. Tuck the de-juiced lemon half next to the salmon for extra flavor and cover with aluminum foil and bake.  Depending on the thickness of the salmon, it should take about 15-20 minutes. A single, thinner fillet may only take  about 10-12 minutes. Hint: White tear drops will start to form on and around the salmon when it’s ready. Don’t be afraid to under cook the fillets slightly because next up is the broiler once the sandwich is assembled.

After they’re baked, keep the salmon fillets warm under the foil on a plate. Chuck the roasted lemon.

Lightly butter the 2 slices of chewy country bread.  Heat a pan to medium-high and toss on the buttered slices. Heat until golden brown.

On a cookie sheet, assemble the sandwiches by placing the slices of bread in the center of the cookie sheet, then a fillet of salmon on each slice. If the salmon is too thick, or looks awkward and block-ish, fan it out across the bread. The fillet will break apart naturally. Mix the fresh chopped dill with grated Havarti and sprinkle generously over the salmon.

Broil the open face sandwiches for about 3 minutes.  Check on them constantly so they don’t burn! They’re ready when the cheese is golden and bubbly and the oven hasn’t caught fire. #winning

Serve with a lemon aioli (recipe below),  a piping hot soup and a cool, crisp salad and you’re ready to go!

Lemon Aioli 

  • juice of 1/2 lemon
  • 2 T mayonnaise
  • 1 T finely chopped dill
  • cracked pepper

No magic here, mix all ingredients together until smooth and yummy. Adjust flavors as needed, serve with your delicious sandwich.


Filed Under: Dinner Tagged With: cheese, dinner, lunch, Main, salmon, sandwich, sauce, seafood

Insta(gram) good: Baked stuffed peppers with brown rice and spinach

October 28, 2013 by Eva Louise 1 Comment

smokshow peppers

As my brother would say, this dish is a total smokeshow…OK, I think he uses that in reference to chicks, but let’s diversify its meaning. I wasn’t planning on posting this on the bloggy but one of my friends just asked for the recipe on Instagram and then I realized that I’d like to remember how I made this too! I really hate peppers and I really hate brown rice but for some reason I always crave this dish, especially after the gym. It’s quick, easy, hearty, healthy and vegetarian…oh, and cheap, that’s always a plus. What’s not to love? Here’s what you need to make: Baked Stuffed Peppers with Brown Rice, Spinach and Pepper Jack Cheese.

Makes 2 really huge post-gym servings

  • 3/4 dry cup of brown rice, cooked per instructions (yields about 1.5 cups, cooked)
  • 1.5 cup sour cream
  • 3/4 cup grated pepper jack cheese
  • 2 medium white onions, diced
  • 3 garlic cloves, or if you’re me, 5 cloves
  • 2 packages frozen spinach, defrosted and drained
  • 3 beautiful bell peppers, tops cut off and ribs removed or cut in half with ribs removed
  • smoked paprika
  • cayenne pepper
  • S/P

Pre-heat oven to 350.

In a large, shallow pot, heat 2 T olive oil at medium-high heat. Add diced onions and crushed or pressed garlic cloves. Soften for about 5-7 minutes. Add salt and pepper to taste.

Reduce heat to medium-low. Take the spinach by hand and break apart into the pot and mix in with the onion-garlic mixture. Fold in the cooked brown rice, sour cream and 1/2 cup of the pepper jack, reserving the rest for the tops of the stuffed peppers.

Sprinkle about 1.5 T of smoked paprika and a few shakes of cayenne depending on your preference over the mixture.  Adjust flavors accordingly, it might need more salt and more garlic at this point.

While the spinach, cheese and sour cream warm, line a cookie sheet or casserole dish with tin foil, placing the bell pepper halves snuggly together, insides facing up. Salt the bell pepper halves lightly; no need for oil as there is enough moisture in the peppers to keep them from sticking or burning.

Spoon the delicious mixture into each of the pepper halves, packing it down as you go. Sprinkle the remaining pepper jack cheese over the stuffed peppers and bake in the oven until golden brown and fragrant, about 30-35 minutes.  Serve as is, or with shrimp, chicken or salmon.

Follow me on Instagram @evalou for more!

Filed Under: Dinner, Sides Tagged With: cheap eats, cheese, cooking, fall, food, healthy, recipes, rice, side dish, vegetarian

Committing food mutiny with bulgur, eggplant, pomegranate and feta

October 1, 2013 by Eva Louise 3 Comments

bulgarsalad

There are some meals I steer away from cooking because Stingray doesn’t like certain ingredients. Since I’m the best girlfriend ever, I almost exclusively cook in line with his tastes, but the other night I threw down my apron and got all HMS Bounty on his ass. He wasn’t happy; here’s what happened:

“Damnit, Stingray, that’s it! Tonight, I’m giving you the triple threat!” I bark.

Stingray gasps in horror and then, with closed eyes he pleads, “Oh, but Evie, what does that mean?! You’re going to feed me something I despise?!”

“Yes, Stingray. The time is now for you to eat your three least favorite foods: eggplant, pomegranate and…”

“Wait… Evie, what?! It’s not…no!” Now on his knees leaning on the fridge to steady himself, Stingray whispers, “It can’t be…”

“Oh yes, yes it is. Feta. Sheep’s milk feta.“

“Nooooooo!” Stingray screams with his fist to the air, camera zooms out,  as Eva walks triumphantly to the grocery store.

Ok, none of that actually happened but Stingray really hates eggplant and feta, but this week I didn’t care because I got this great idea to make a warm bulgur salad with roasted eggplant, garlic, onions served with pomegranate and sheep’s milk feta. It was awesome.

salad

Serves 4

Ingredients

  • 1 cup bulgur
  • 2 cups water
  • 1 medium/large eggplant
  • 2 small white onions or 1 large one
  • 6-8 cloves of garlic
  • 1 cup pomegrnate seeds
  • sheep’s milk feta
  • juice and zest of 1 one lemon
  • seasoning: salt, pepper, cayenne, italian seasoning, fine herbs

Pre-heat oven to 375.

Chop onions and eggplant into about 1 inch cubes and lay in foil-lined cookie sheet. Whack the 6 cloves of garlic with a knife and add to the onion-eggplant mixture.  Season generously with salt, pepper, cayenne, Italian Seasoning, and Fine Herbs (if you have them) and olive oil.  Toss with your hands to ensure the vegetables are coated with oil and seasonings.

Bake at 375 for about 20 minutes or until caramelized.

Heat 2 cups of water and 1 cup Bulgar in medium pot until boiling, reduce heat and simmer, mixing occasionally until cooked, about 10 minutes.

Once cooked, fold the eggplant, onion, garlic mixture as well as the juice of one lemon.  Taste before serving on pretty platter.  Garnish with lemon zest, crumbled feta and pomegranate seeds.

Food mutiny complete!

Filed Under: Sides Tagged With: cheese, cooking, eggplant, food, grains, greek, mediterranean, recipes, salads, sides, vegetables

Lend me your ears!…for some Eva-style Elote

August 29, 2013 by Eva Louise 9 Comments

DSC_0543DSC_0544

I don’t really like ears of corn. There’s something so cumbersome about the way they look that turns me off…as in, they look like a real commitment to prepare and eat. You know? No? OK, yea, I forgot that everybody else on the planet freakin’ loves corn…Which means I need to have a few corn recipes in my repertoire. FINE.

Luckily, my Mom decided to buy a million ears of it for our recent trip to British Columbia, so this was the perfect time to practice. I decided to do a riff on elote, Mexican street corn and used our BBQ to char the corn before preparing the dish. Not revolutionary, but it took the dish to a totally stellar level.

Eva-style Elote

Ingredients

  • 3 ears of  corn, husks off, stub on (makes it easier to BBQ)
  • 1/2 medium red onion, diced
  • 1 bunch cilantro, rinsed and roughly chopped
  • 1 can black beans, rinsed
  • 2 heaping dollops of crema (Mexican sour cream), creme fraiche (French sour cream) or just regular sour cream
  • 1 heaping T mayonnaise
  • 1/4 cup crumbled cotija cheese or grated Parmesan
  • juice of 1 juicey lime
  • pinch of cayenne pepper
  • 1 ripe avocado

Char the ears of corn for about 8-10 minutes on a seriously hot grill or griddle pan, probably, 375-400 degrees. Let them cool long enough to take a knife to chop off the kernels.  Reserve a small bunch of kernels, cotija, cilantro and avocado for garnish later, then mix corn with all of the other ingredients EXCEPT the avocado.  Careful on the mayo and crema to make sure you don’t add too much. Taste and adjust flavors accordingly. Fold in the diced avocado near the end so it doesn’t squish. Cover and refrigerate for about 30 minutes. Garnish the mixture with the remaining corn, cotija, cilantro and avocado, then serve!

DSC_0542

Filed Under: Life & Travel, Sides Tagged With: British Columbia, Canada, cheese, cooking, corn, Elote, food, Mexican food, recipes, salads, sides, summer, tofino, vegetables

Put this in your pipe and smoke it! No, no, please just eat it with some cream cheese

August 23, 2013 by Eva Louise 4 Comments

candy1candy2

So you’re probably wondering, Evey, what’d you do with that Coho you slaughtered in your last post? I’ll tell you what we did, we made smoked salmon of course…we’re Jews after all…! Our smoked salmon is insanely delicious, meaty, brine-y and flavorful, not those slimy, thin, hot pink lox you get at the deli.  

accoutrements

All the accompaniments are just as essential as the smoked salmon: cream cheese, capers, red onion, tomatoes and lemons.

Obviously I’ll never make this in my New York apartment, but I would like to have this recipe on file. It’s funny because as I’m typing, I’m looking in the guest book of our Tofino house (we keep a guest book/journal every year so we can remember everything, recipes included) and apparently Dad calls this recipe his “Lil’ Chief Smoked Salmon Deluxe,” so we’ll continue to call it that.

Lil’ Chief Smoked Salmon Deluxe

salmonsalmon2

The process is quite long (about 13 hours door to door NOT including actually catching the fish) but nice and easy if you have the time and a smoker.  We start with a super intense brine with the ingredients below. Mom and Dad will adjust the recipe depending on what’s in fridge but you get the idea.  We leave the fillets to brine for about 4 hours in the fridge, then leave it to air dry on the counter until it forms the pellicle – that glossy, salty seal on the top of the fish which apparently helps the smoke adhere to the fish more effectively. Then we smoke it in our smoker (looks like a mini-bar fridge) for 6-8 hours at different temperatures (below). I might not be able to smoke the fish back in New York but I sure can eat it back in New York! Going to have to have you all over for brunch soon…

For the Brine

  • 1 cup water
  • 2 cups soy sauce
  • 1/4 cup non-iodized salt
  • 1/3 cup brown sugar
  • 1 cup dry white wine
  • 1/4 cup lemon juice
  • crushed garlic (knowing my family, a whole bulb)
  • onion powder or chopped onions

Smoke for:

  1. 1-2 hours at 100-120F
  2. 2-4 hours at 140F
  3. 1-2 hours at 175F

Filed Under: Breakfast, Dinner Tagged With: British Columbia, Canada, cooking, fish, food, recipe, salmon, seafood, smoking, tofino, tofino time

Sharpening My Dad Skills

August 22, 2013 by Eva Louise 3 Comments

blankcanvas

Let’s get started

Omelettes, baking (of any sort), pivot tables, PowerPoint presentations, refraining from opening other peoples’ mail,  picking up my dry cleaning when it’s actually ready, controlling my hanger (that special type of rage you get when you’re starving), cheese-making, sushi rolling, running…

These are all things I’m not particularly good at; the most devastating addition to this list is fish filleting.  It’s kind of pathetic given my family’s fishfolk status but my dad spoils me and presents me with perfectly filleted kitchen-ready salmon all the time…So, hey! What’s my motivation to figure out how to cut these damn things myself?!  In efforts to be more self-sufficient,  I finally tried my hand at filleting a whole Coho, under Dad’s direction of course.

I don’t know about you, but trying to learn stuff from Dad is the most frustrating and painful process. Ever. Yes, I love him and yes, he has tons of knowledge to impart but man, that guy has NO PATIENCE (cut to tear-laden movie montage of me learning to walk, ride a bike, drive a car…). And as articulate and commanding as he must have been on Wall Street back in the day, when he’s trying to teach me something he makes NO SENSE WHATSOEVER. 

So there we were with a Coho, 2 sharp knives and my lovely sister to document the whole thing…

wholesalmon

I started off strong….goodstart

Wouldn't be lesson learned without "too many cooks in the kitchen"!

When I’m struggling, it really helps when two people start giving me competing advice. Please, please provide me with competing advice. It calms me.

I just went haywire here with my hands criss-crossed. Under no circumstance does this look safe!

I just went haywire here with my hands criss-crossed. Under no circumstance does this look safe!

Filleting towards your own fingers...also not a good idea....

Filleting towards your own fingers…also not a good idea…

goodstart

Got my groove…kind of

awww

….I could strangle him right now! Eyyy…but I did it! Daddy’s so proud!success

Filed Under: Life & Travel Tagged With: British Columbia, Canada, dad, daughters, family, fathers, fish, knife skills, salmon, seafood, tofino, travel

  • « Go to Previous Page
  • Page 1
  • Page 2
  • Page 3
  • Page 4
  • Interim pages omitted …
  • Page 7
  • Go to Next Page »

Primary Sidebar

Don't miss a post!

Enter your email to subscribe and receive notifications of new posts by email.

Welcome

I’m Eva Louise and welcome to Mind in the Butter! This is my food bloggy, showcasing my favorite dishes and recipes often inspired by and cooked for my loved ones. My goal with this blog is to eventually document every single dish I make so when I’m old and stale, I will be able to remember and celebrate memories from my favorite place…the kitchen!

Recent Posts: Mind in the Butter

Shulamit’s Unreal Lasagna with Ground Beef and Spinach

Best-ever 4 minute Instant Pot Rice

Best-ever 4 minute Instant Pot Rice

Seared Scallops and Fennel Risotto

Seared Scallops and Fennel Risotto

Palm Springs: the World’s Best Jetlag Cure

Palm Springs: the World’s Best Jetlag Cure

The Karmic Boomerang is real! New Year, new beginning for me

The Karmic Boomerang is real! New Year, new beginning for me

Copyright © 2025 · Foodie Pro & The Genesis Framework